Scheduling Profiles
To add an appointment using scheduling profiles
- When in Work Order
- Select Add Appointment on the left menu.
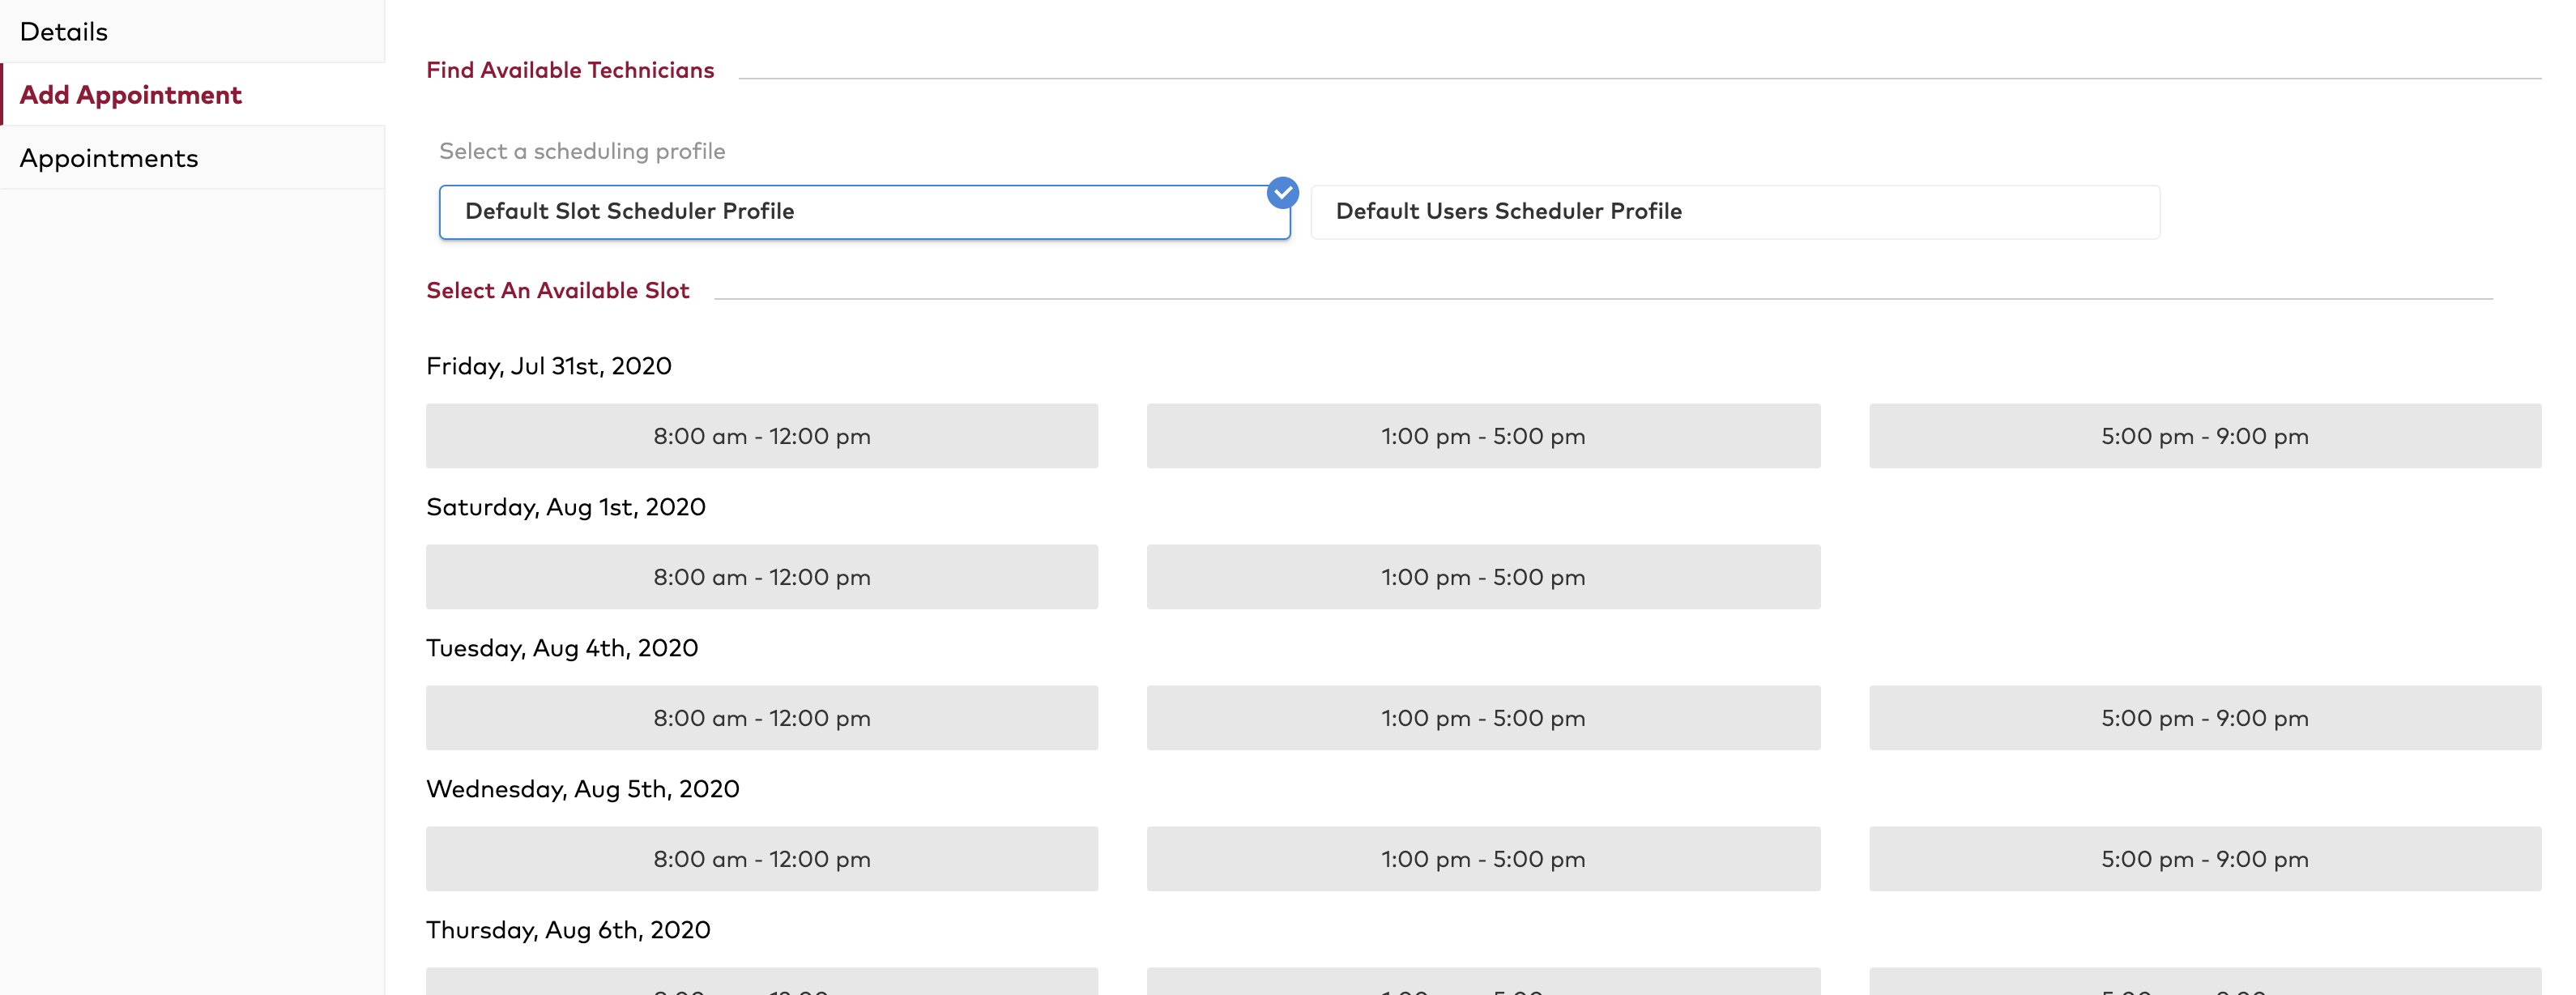
- Select a Scheduling Profile. To learn more about Scheduling Profiles, see Introducing Scheduling Profiles.
Default Slot Scheduler Profile
- When using a slot scheduler, select a time slot for the appointment.
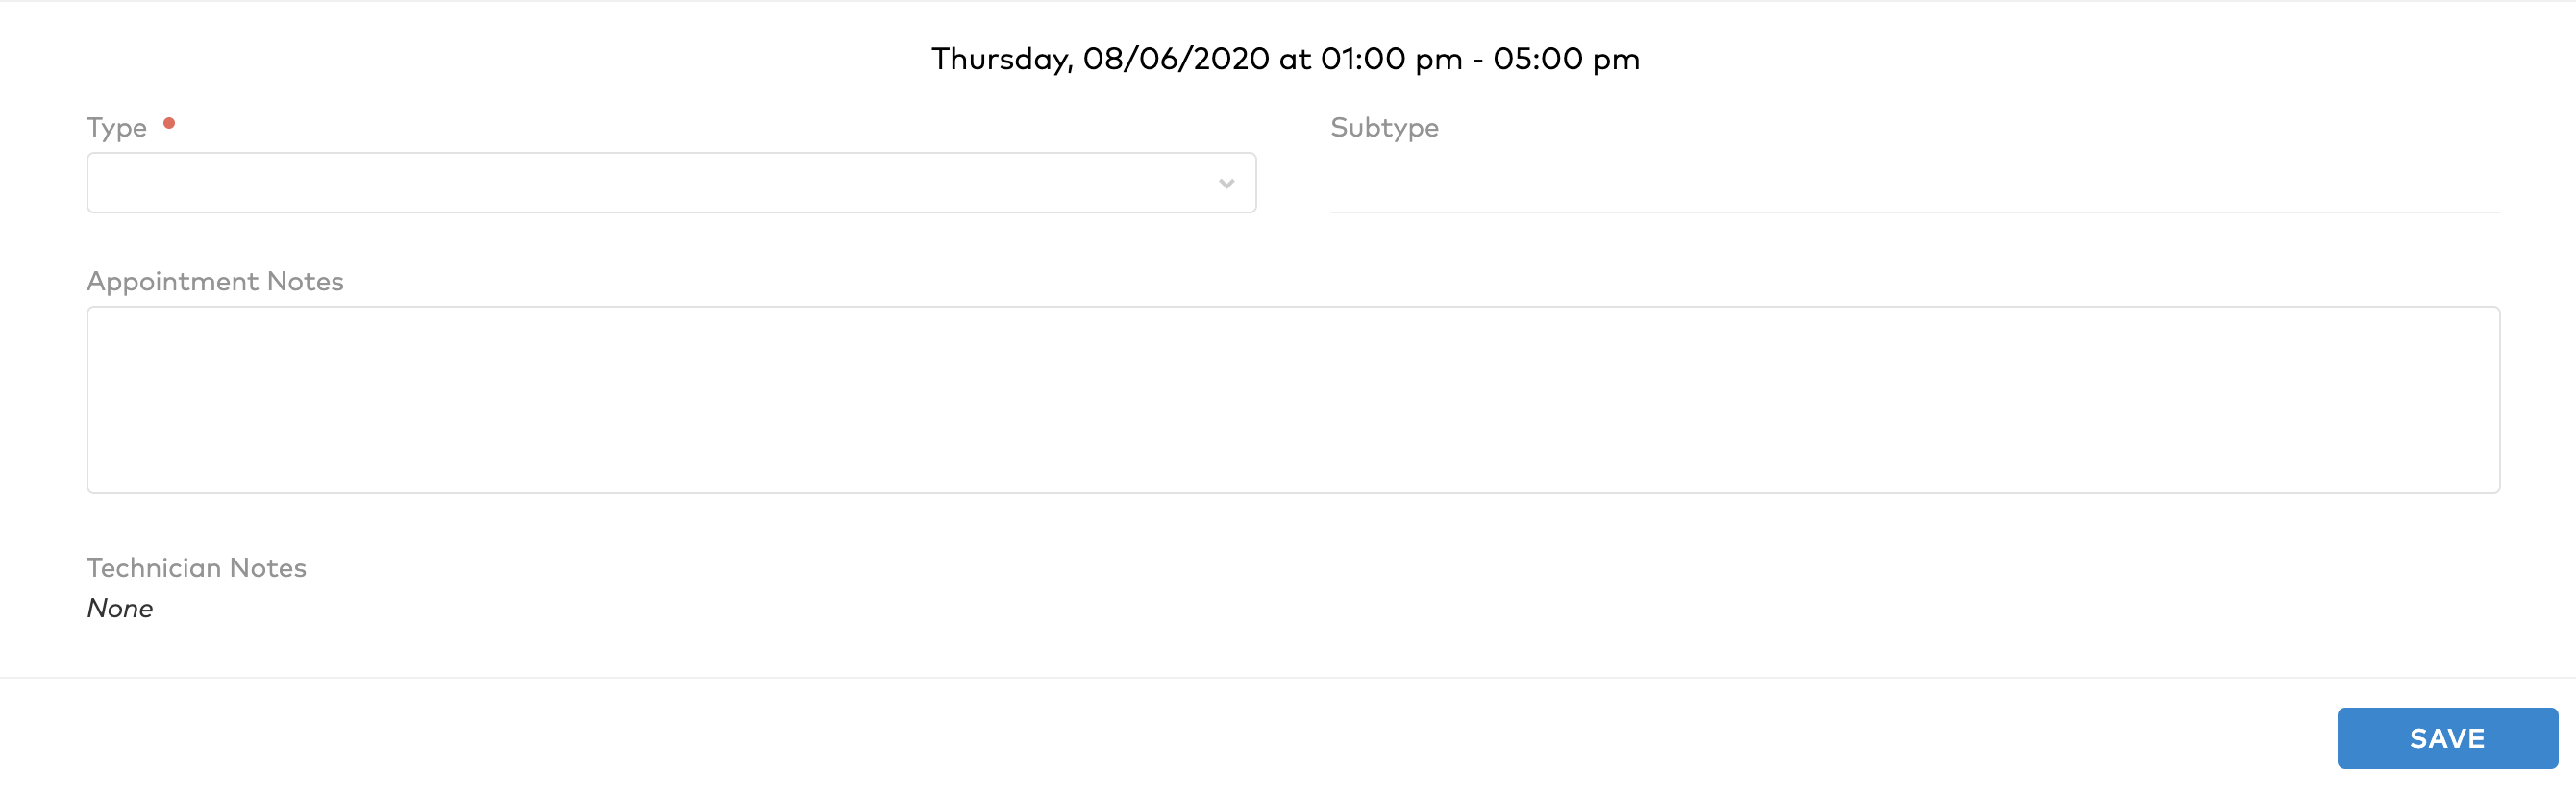
2. Fill out the required fields and click Save.
Note: This can not be performed if the customer address is not associated with a valid geocode.
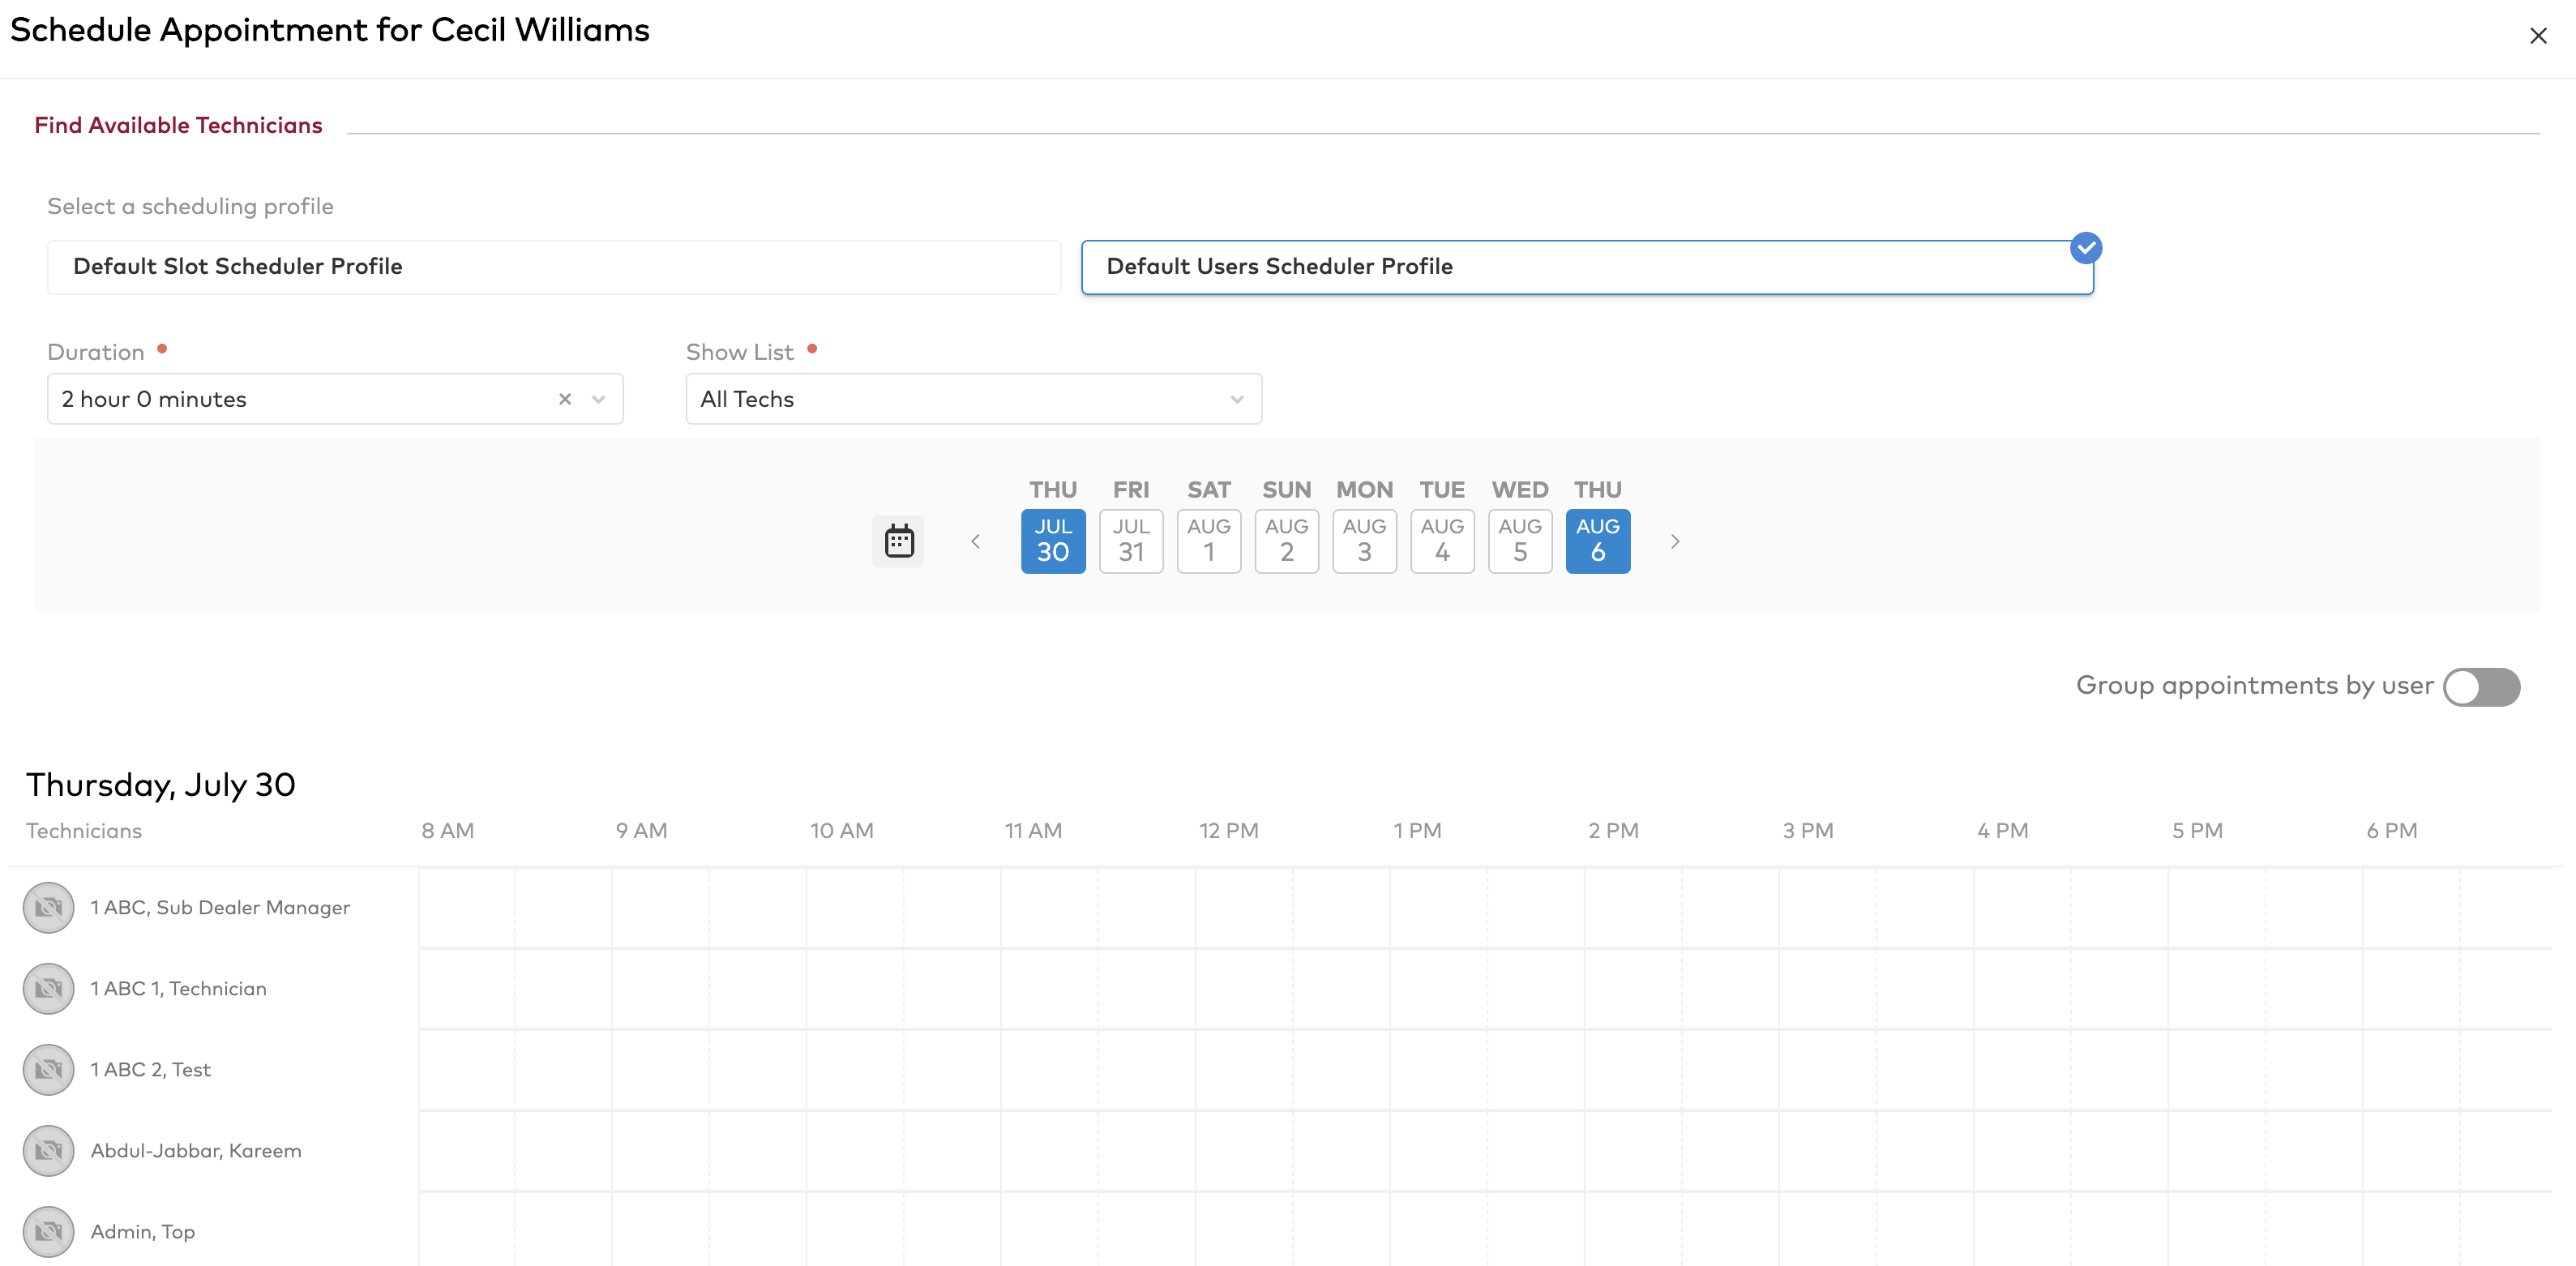
Default User Scheduler Profile
- Select the requested time from the Duration dropdown menu.
- Select the technician from the Show List dropdown menu.
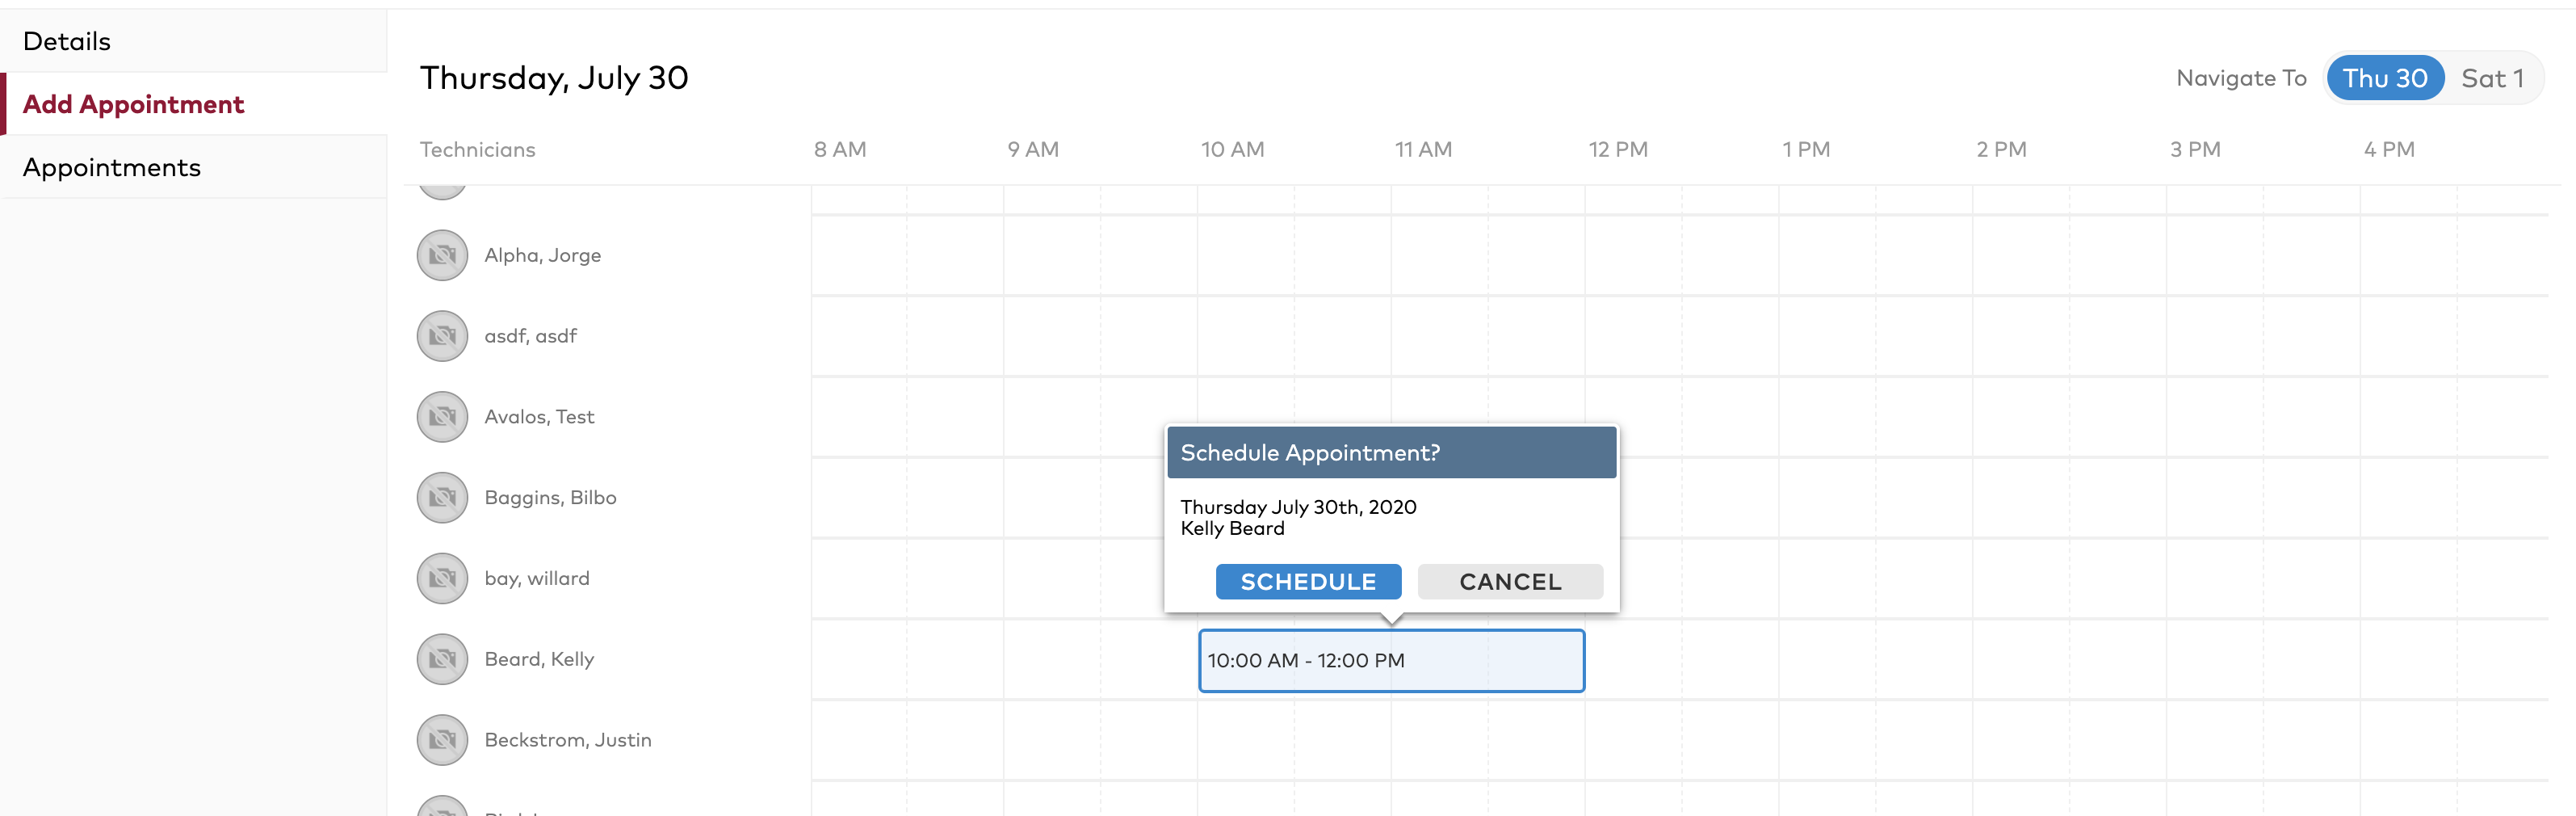
- Select the required date(s) and schedule.
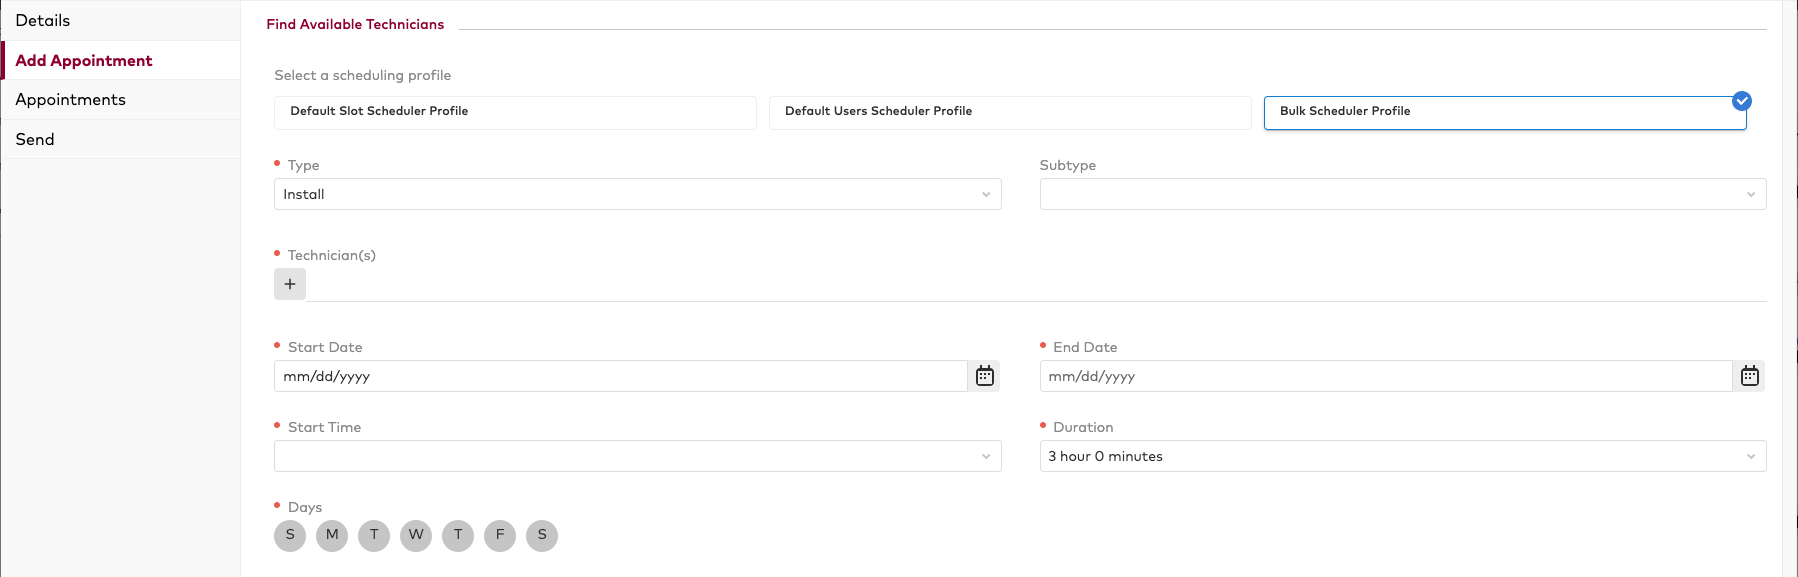
Bulk Scheduler Profile
This profile is intended to create multiple appointments in bulk as well as create them for multiple technicians.
-
With the Bulk Scheduler Profile selected, choose your appointment Type and Subtype.
-
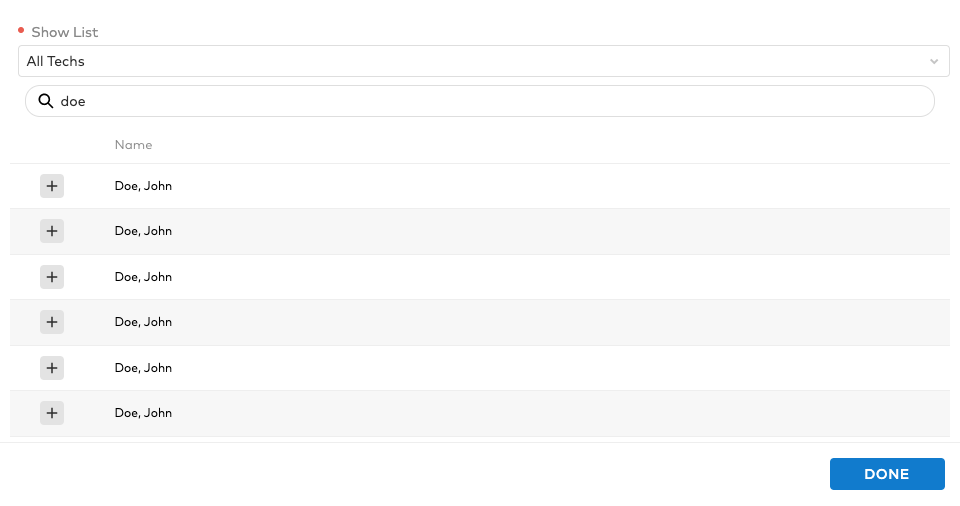
In the Technician field, click on the plus (+) button to add technicians.
o In the new modal, you can filter the list by All Technicians, Technicians in Location, or Technicians in Radius.
o You can then search for technician names within the chosen filter.
o Click on the plus (+) button next to the technicians you want to select and click Done to return to the scheduler.
-
Select the start date for the first appointment you wish to create and the end date for the final appointment.
-
Select the start times and duration of the appointments. These will apply to all appointments created.
-
Select the days of the week you wish to create appointments for
-
Add any appointment notes you would like. These notes will exist on all appointments created
-
Click Schedule and review the confirmation details. Note that all technicians will have their own individual appointments
-
Click Save to complete scheduling the appointments
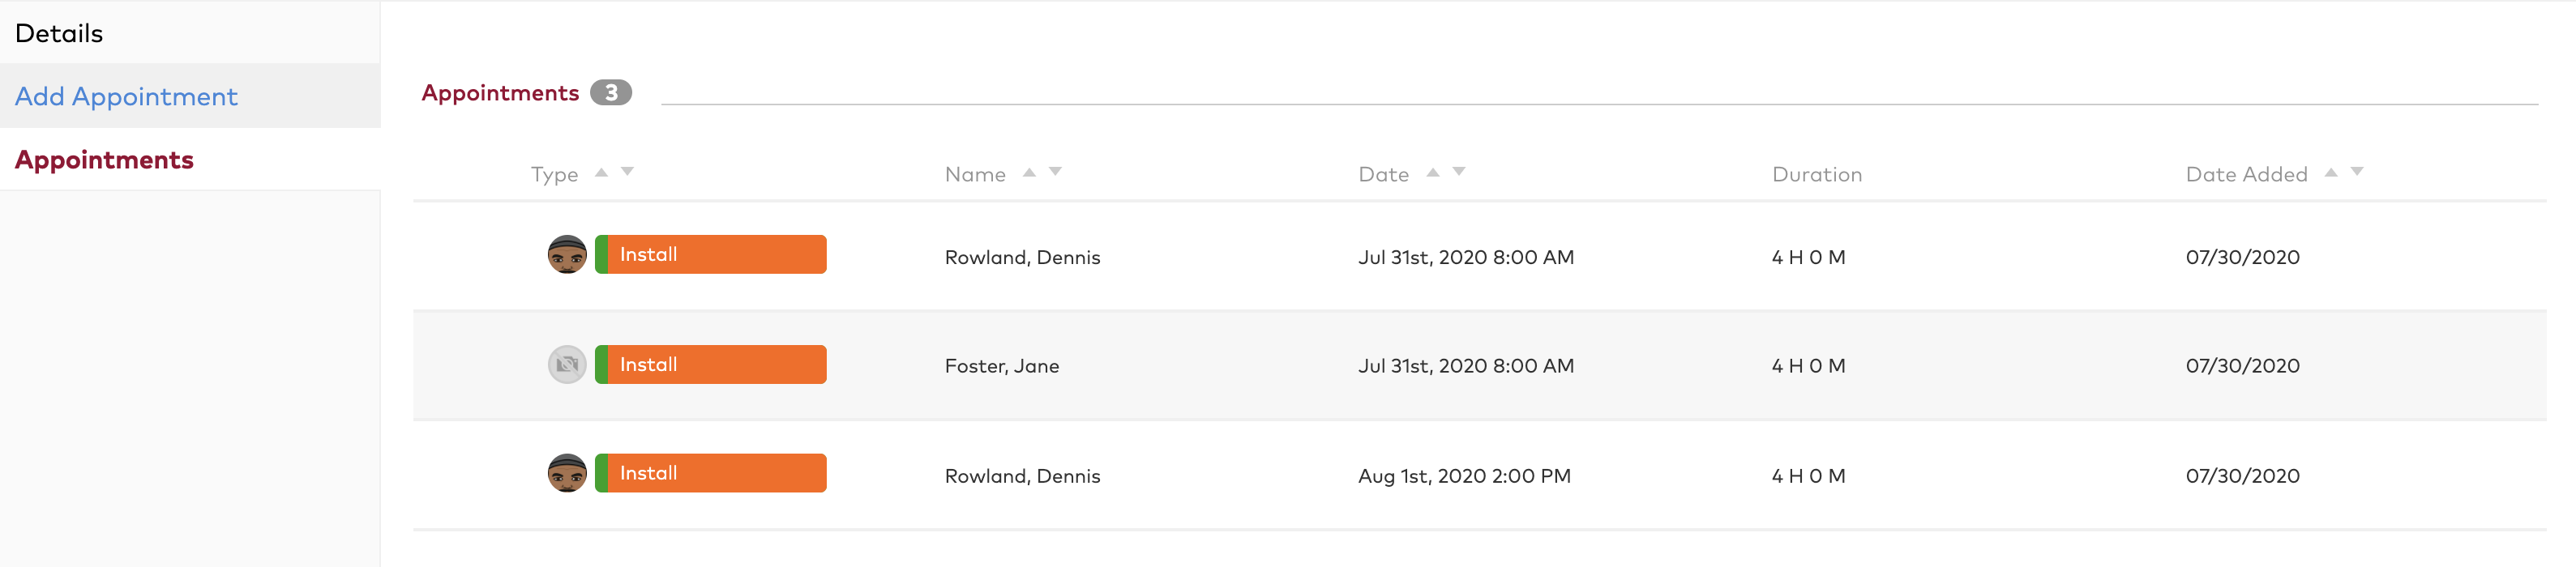
To view the appointments list
- Select Appointments to see the scheduled appointments.
To edit an appointment for a work order
- Select anywhere on the row of the desired Appointment.
- Make any desired edits.
- Select Save.
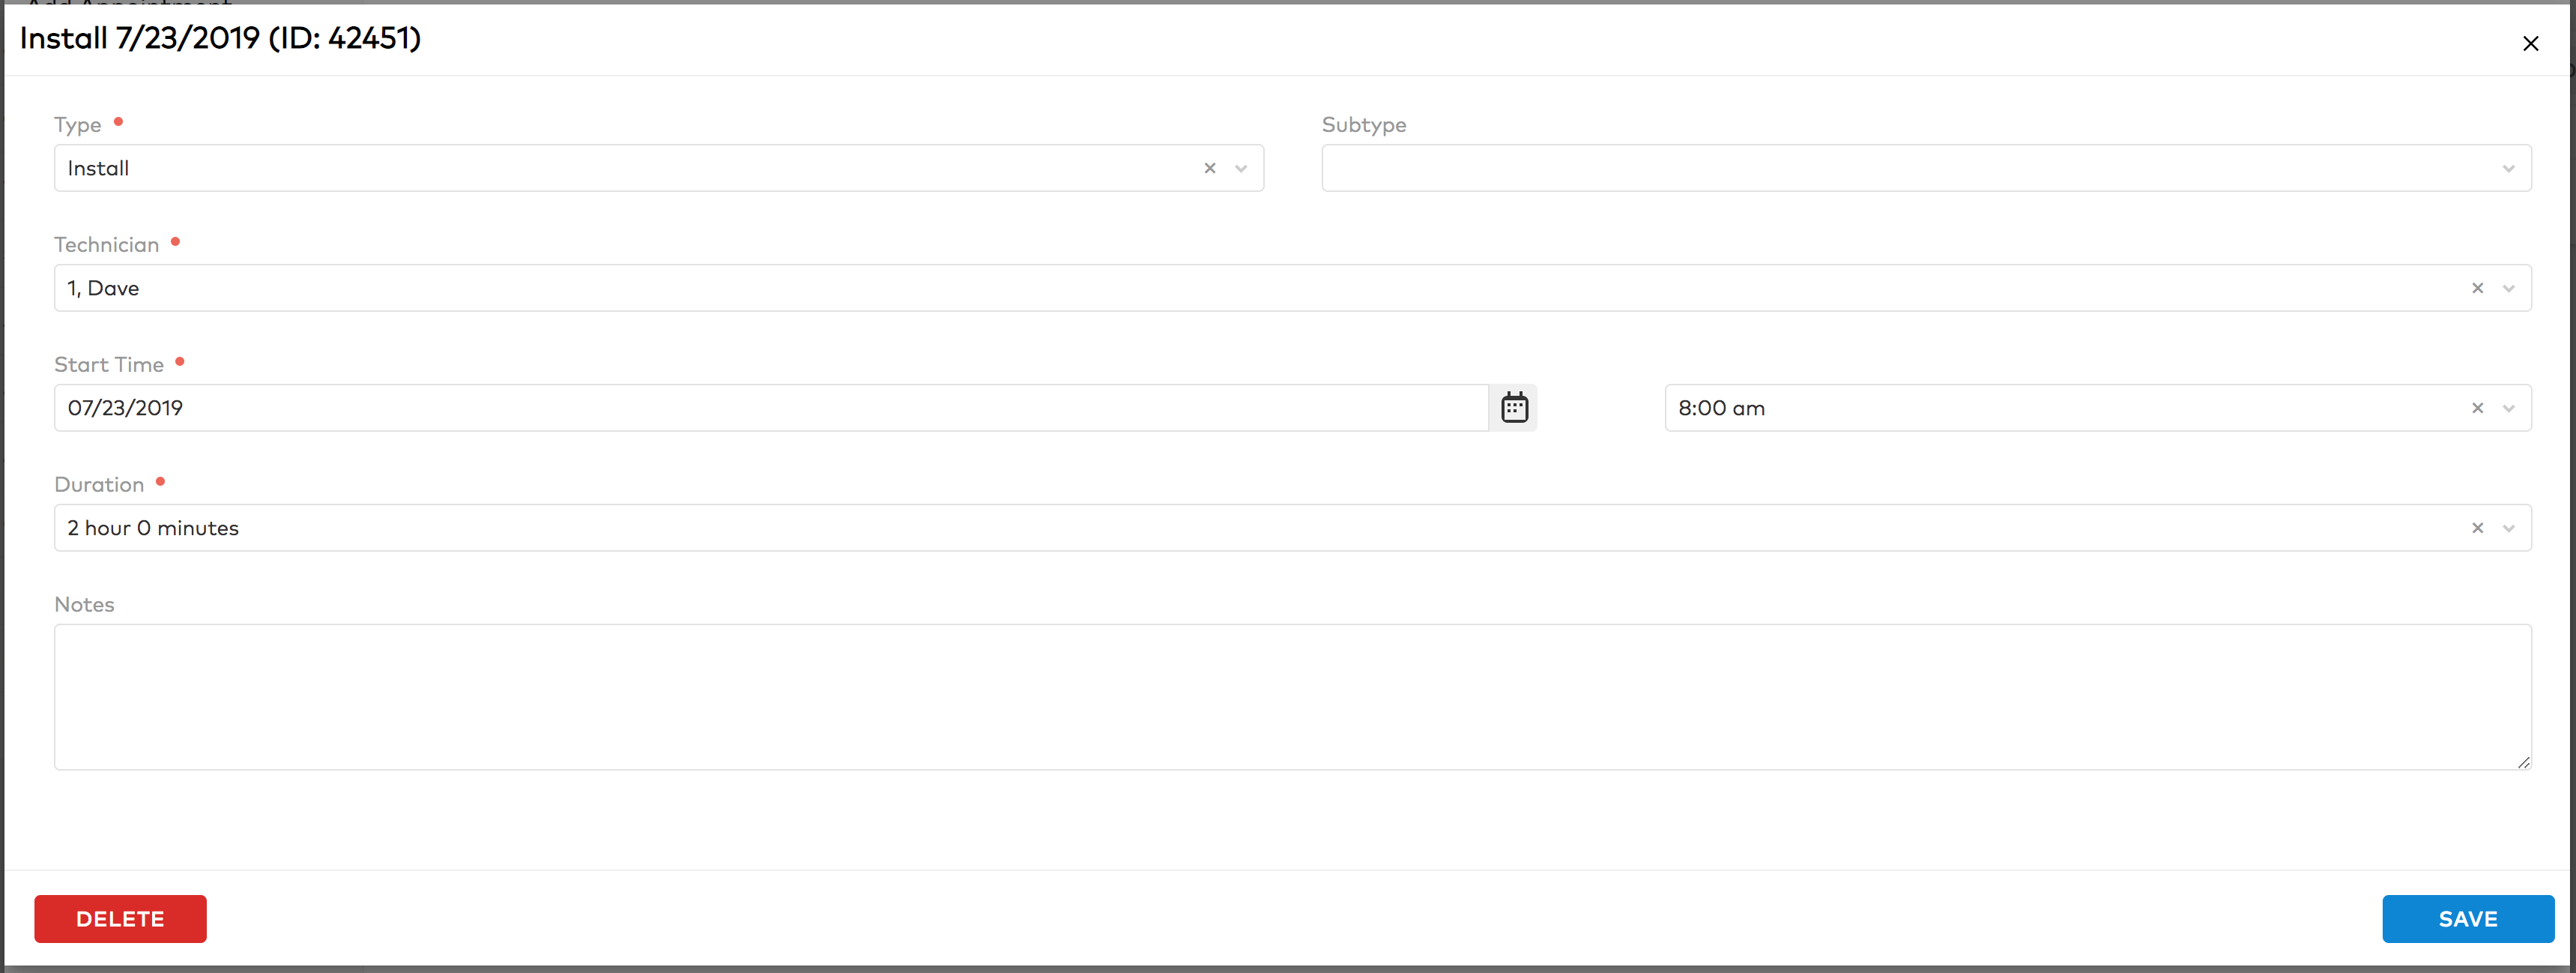
To delete an appointment for a work order
- Select Delete on the lower left of the page.
- A confirmation message will appear.
- Select Delete to confirm.