3) Organization
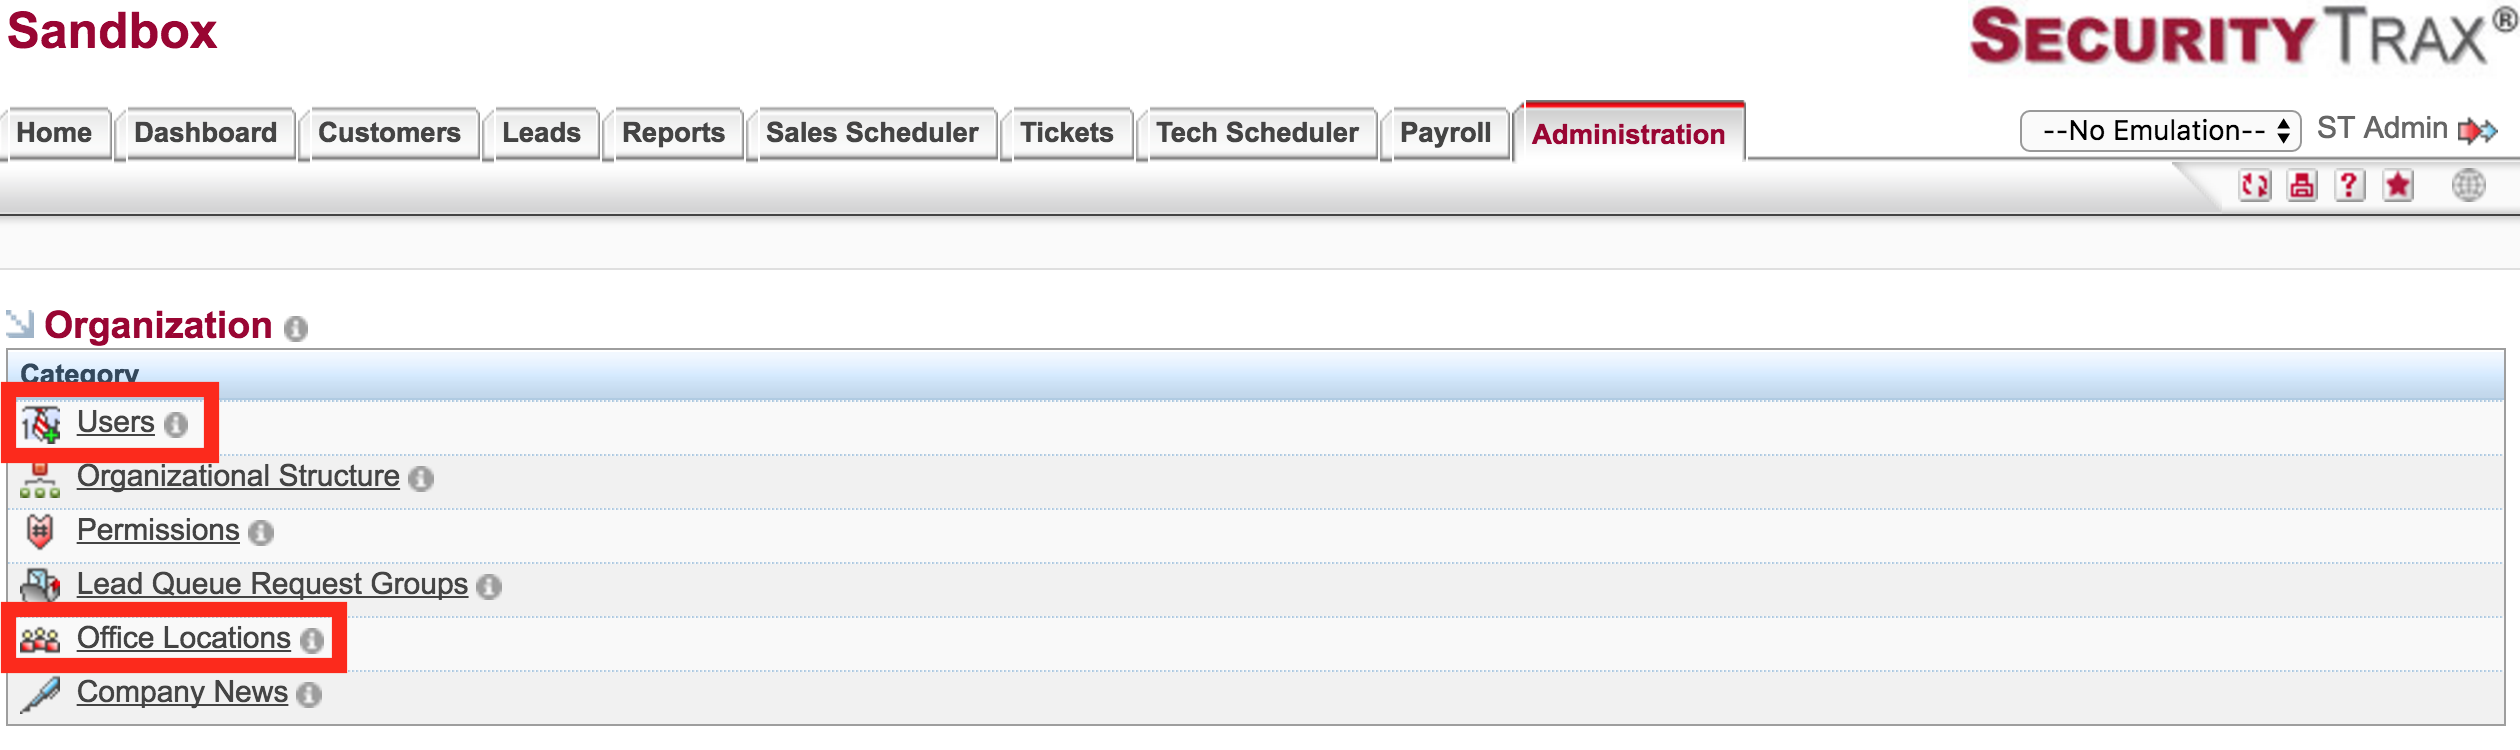
Inside of the Administration Tab you will find the Organization section at the top. This is where you will manage the organization of your company; from creating Users, tweaking Permissions, and sending out announcments.
For now, in this QuickStart Guide we will set up two simple things: Users and Office Locations.
Creating a User
'Users' are employees, sales reps, or technicians who work for your company and need access to SecurityTrax. In order to create a new user, follow the steps below:
If a user doesn't work for your company exclusively, they should be paying for their own instance of SecurityTrax.
Account Information Section
- Click on the Administration tab
- Click on Users under the Organization section
- Click Add User
- Fill in the fields in the Account Information section
Selecting a Carrier next to the Cell Phone number enables free texting from SecurityTrax via email. If a Carrier is not selected there will be a $.05 charge per SMS message sent through SecurityTrax.
Marking a number as 'Private' will block that number from showing up in the Employee Directory (See Employee Directory in Onboarding: Definitions.
Preferences Section
- Check or uncheck the boxes in the Preferences section
Email Reminders
Allows the user to receive reminders for appointments via email through SecurityTrax.
Restore Session
Will load the same window that was displayed in the event a user is disconnected from SecurityTrax.
Password Section
- Check all of the boxes in the Password section when setting up a new user. This will email the user their username and a random temporary password. Upon login, the user will be required to change their password.
Change Password
Checking this box is required if a new password is manually entered in the fields below.
New Password / Confirm Password
Manually change then confirm a new password after the initial creation of a user.
Notification Email
Checking this box will send an email to the user with their login credentials.
Generate Random Password
The Notification Email and Change Password checkboxes will automatically be checked when this checkbox is used. A temporary random password will be created and sent to the user.
Force Password Change
Checking this box will force the user to change their password during their next login attempt.
HR Settings Section (Optional)
- Fill in the fields in the HR Settings section
Hire Date
The date that the user was hired at your company.
Start Date
The start date for the user at your company.
Last Day With Company
Will allow funding for jobs completed by that user to still take place.
Recruited By
Links the new user to an existing user. This can be used to easily determine which existing user has referred the most new users.
Payroll Identifier
Is used to capture the unique number a 3rd party payroll company may assign to a user. This number can be used to push or pull information from/to your payroll company if necessary.
Title
Select the Title from the drop-down menu (You can easily create Titles by heading to Administration > Organizational Structure > Add User Title). Ex: VP, CEO, Manager, Sales Rep, etc.
Title Designation
Allows you to avoid having to create 'VP of Sales', 'VP of Marketing', etc. Use 'VP' in Title drop down. The designation would be: 'of Sales'.
Leave Reason
The reason for leaving the company.
Transfer Date
The date the user transferred to your company.
Reports to
This is the hierarchy indicator for which this user reports to.
Administrator Settings Section
- In the Administrator Settings section select the Employee Directory Access using the drop-down menu and check or uncheck the boxes.
None
Gives the user no access to the Employee Directory
Everyone
Allows the user to see all Employees (users) in the directory
Shared Location(s)
Allows the user to see Employees (users) in any Office Location to which the user is assigned.
Hierarchy - Reports to below
Allows the user to contact their manager and Employees (users) at their same hierarchy level or lower.
Descriptions of the checkboxes are below.
Can SMS Users
Allows the user to send SMS messages through SecurityTrax to other users.
Active
Turns the user account on and off.
Can Login
Allows the user to login or not.
User Card Access
Mouse over the small circular picture by a Sales Rep's or Technician's name on a Sales or Tech Schedule to see a user card. They contain contact, company position, and tag information.
It's recommended to never delete a user. Instead, mark them as inactive. This maintains their Customer history for future reference if necessary.
- Click Save & Stay
- Complete the rest of the user setup using the new set of buttons that show up just under the tabs in the center of the window. Brief descriptions of each button are below.
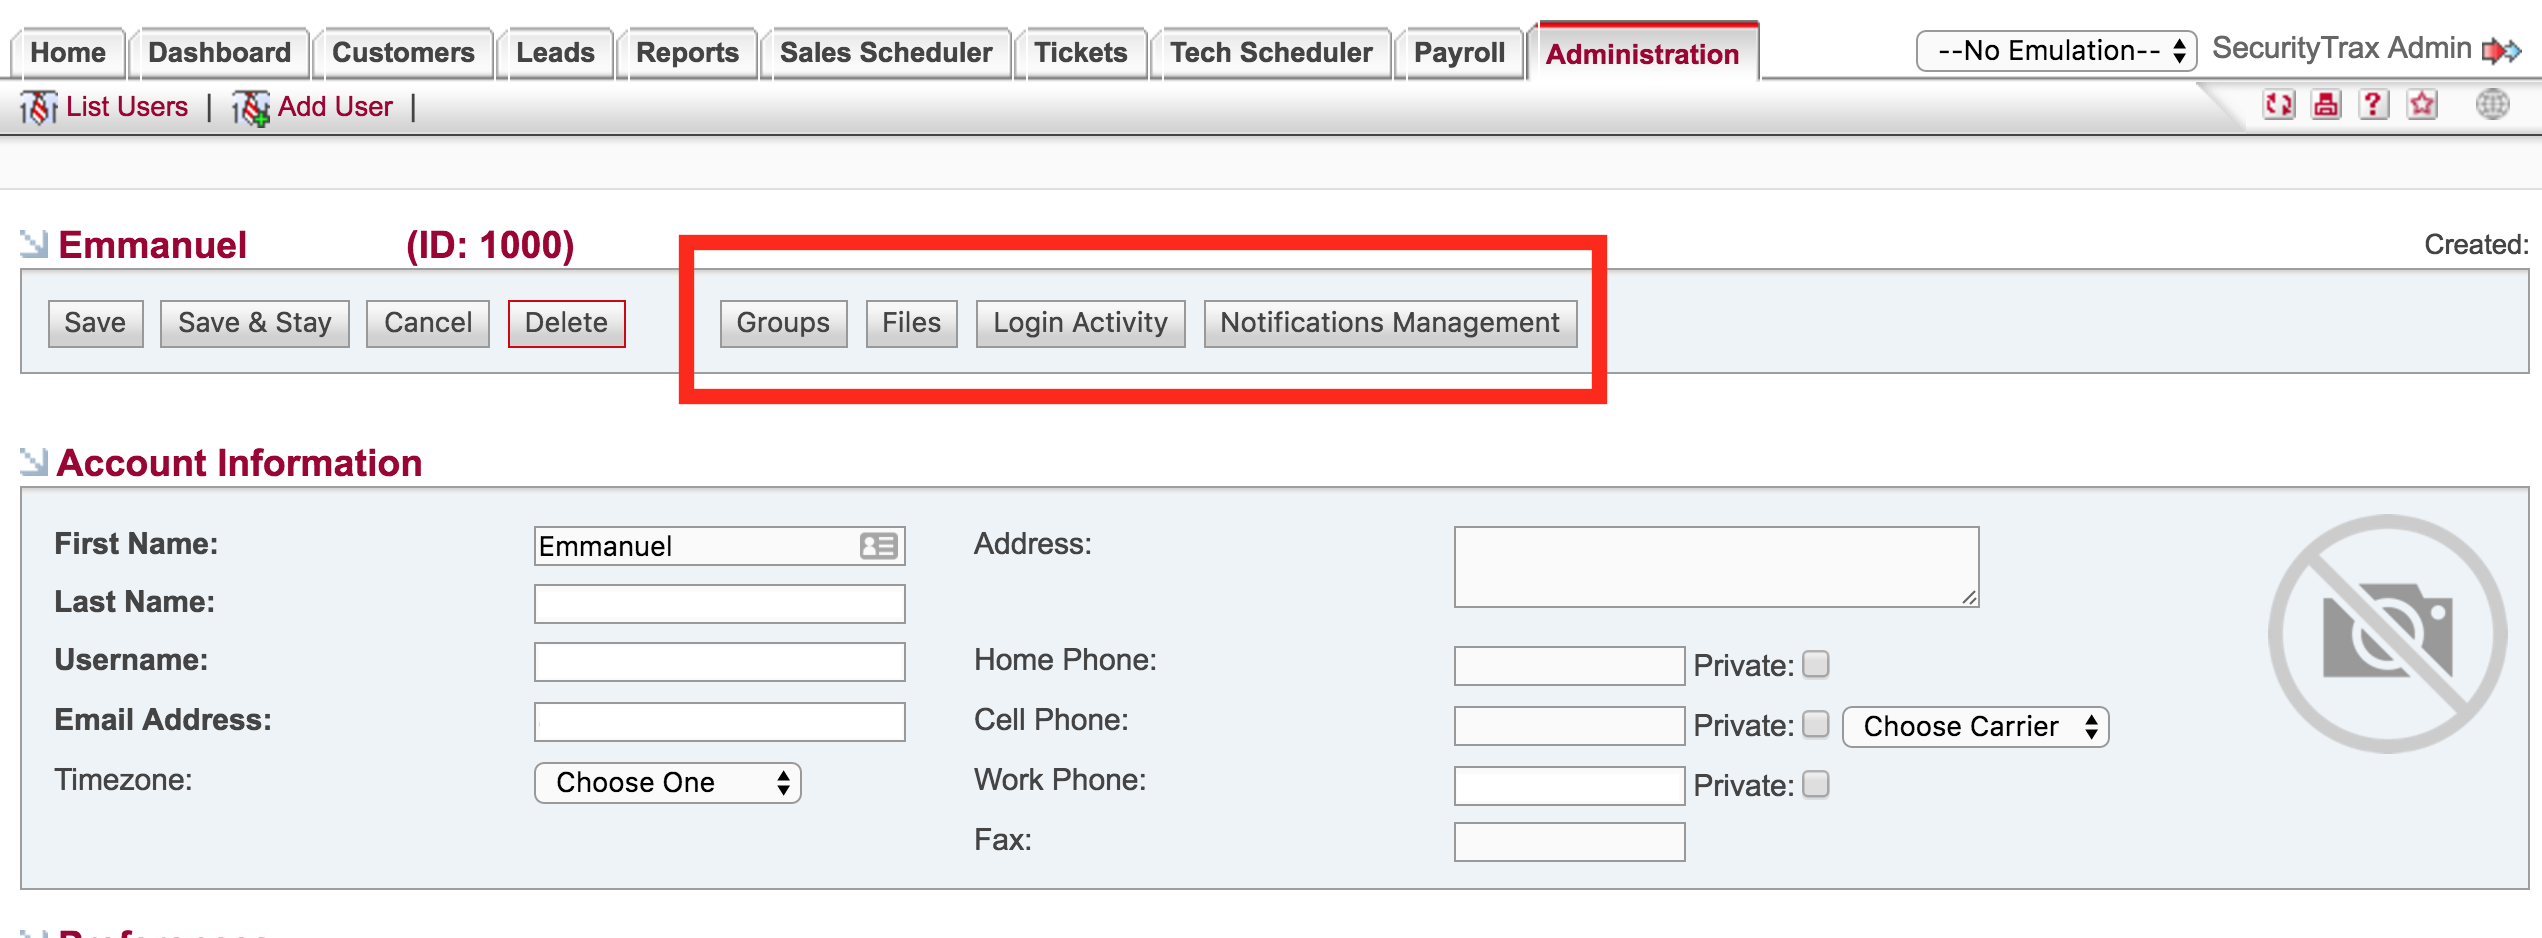
Groups
Where you'll assign to which Permissions Group a user will belong per Office Location. SecurityTrax is heavily permission-based, and we will walk you through how to set up your permissions when you Schedule a Training Webinar. For now, simply remember this location!
Files
Allows you to upload any document related to the user (For example, licenses, certifications, etc.) Upload files and click Save.
Login Activity
Allows you to see a history of when the user has logged into SecurityTrax. This is for reference only.
Notifications Management
Opens a separate window where you'll designate what types of messages you want the user to receive, broken up into 3 subsections: Tech Notifications, Sales Notifications, and User Notifications. (See Notifications Management in Onboarding: Definitions.)
Complete the steps listed in this section for each user. It may take some time to enter the first few users, but once you get the steps down it won't take long.
Office Locations
One or more physical Office Locations can be created in SecurityTrax to separate Users, Permissions, Leads/Customers, and Equipment. Users can be assigned to one or more of the Office Locations and their Permissions can be unique to each Location.
To set up your Office Locations follow the steps below:
- Click on the Administration tab
- Click on Office Locations under the Organization section
- Click Add Location
- Complete the form
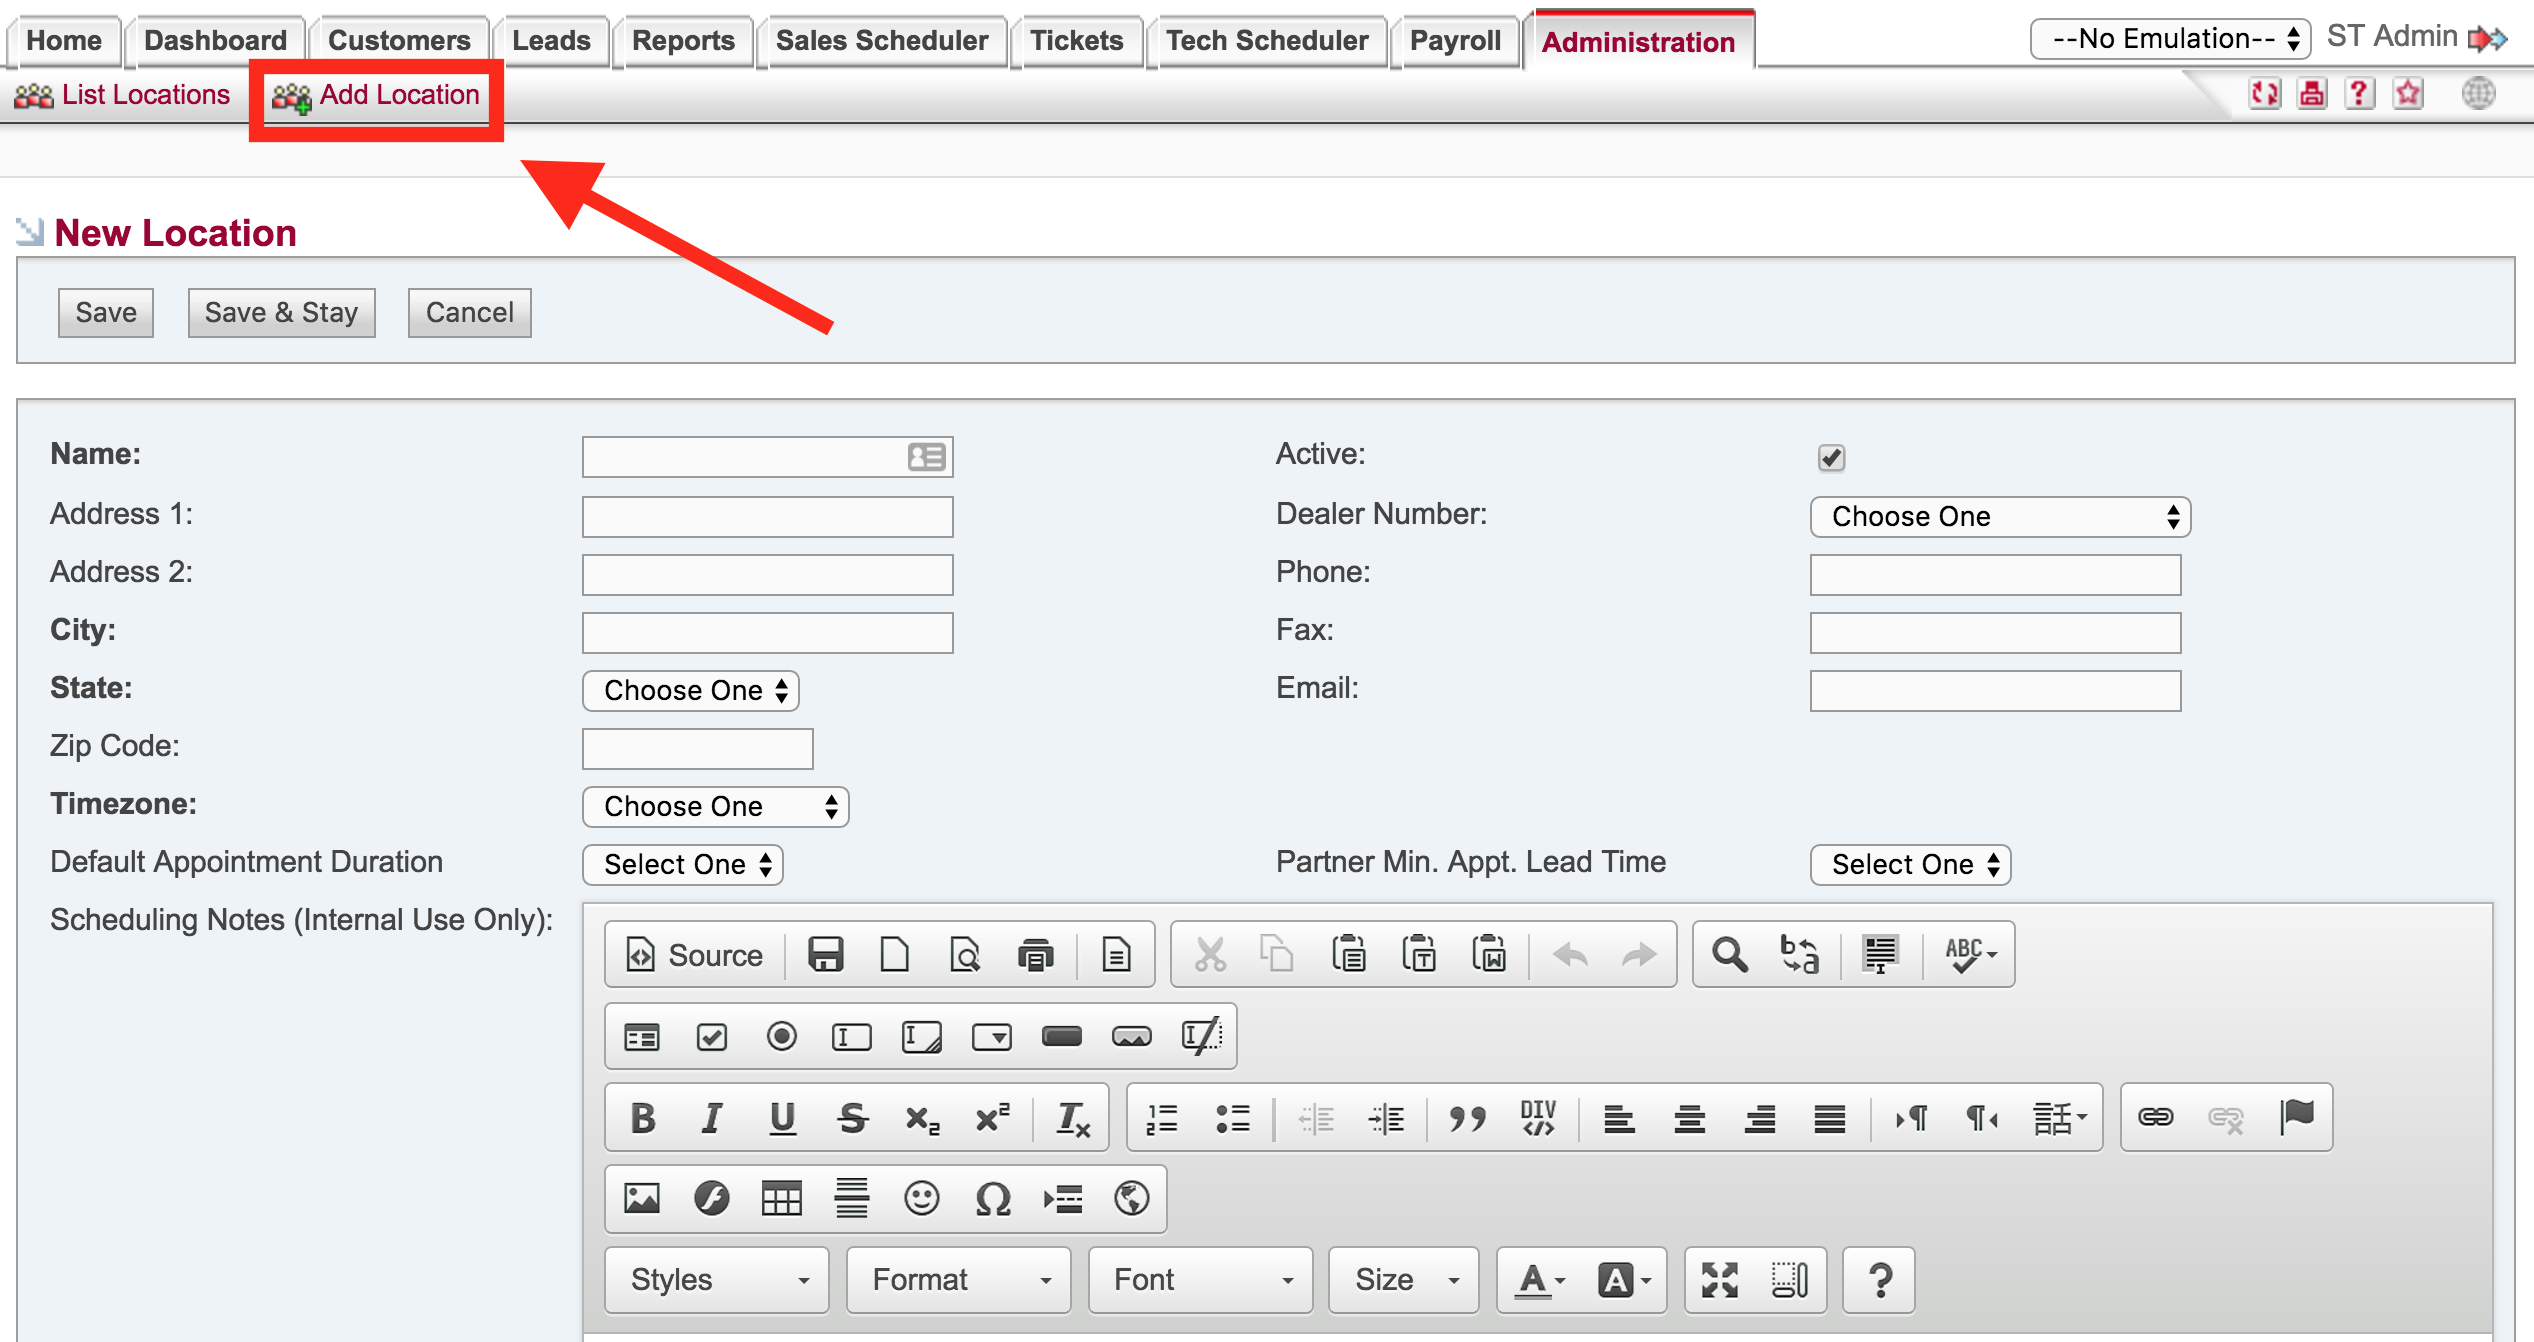
Default Appointment Duration
Will automatically place a value for the appointment length when a new appointment is created. This value can be changed when the appointment is made.
Partner Min. Appt. Lead Time (Partner Minimum Appointment Lead Time)
Sets the minimum amount of time needed to have an incoming lead/customer scheduled by a Partner Company Office Location (Partner Companies will be discussed when you Schedule a Training Webinar).
Scheduling Notes (Internal Use Only)
Displays a note at the top of the Tech Scheduler window to be seen by anyone at YOUR company who has access to setting appointments for a Technician. The HTML editor allows for several editing features (i.e. text color, size, images, etc.)
Partner Scheduling Notes (External Use Only)
Displays a note at the top of the Tech Scheduler window to be seen by anyone at a PARTNER company who has their own instance of SecurityTrax and has access to setting appointments for a Technician in your system. The HTML editor allows for several editing features (i.e. text color, size, images, etc.)
- Click Save
- Repeat for each Office Location