4) Using the Alarm.com Integration
Push a Customer Account to Alarm.com
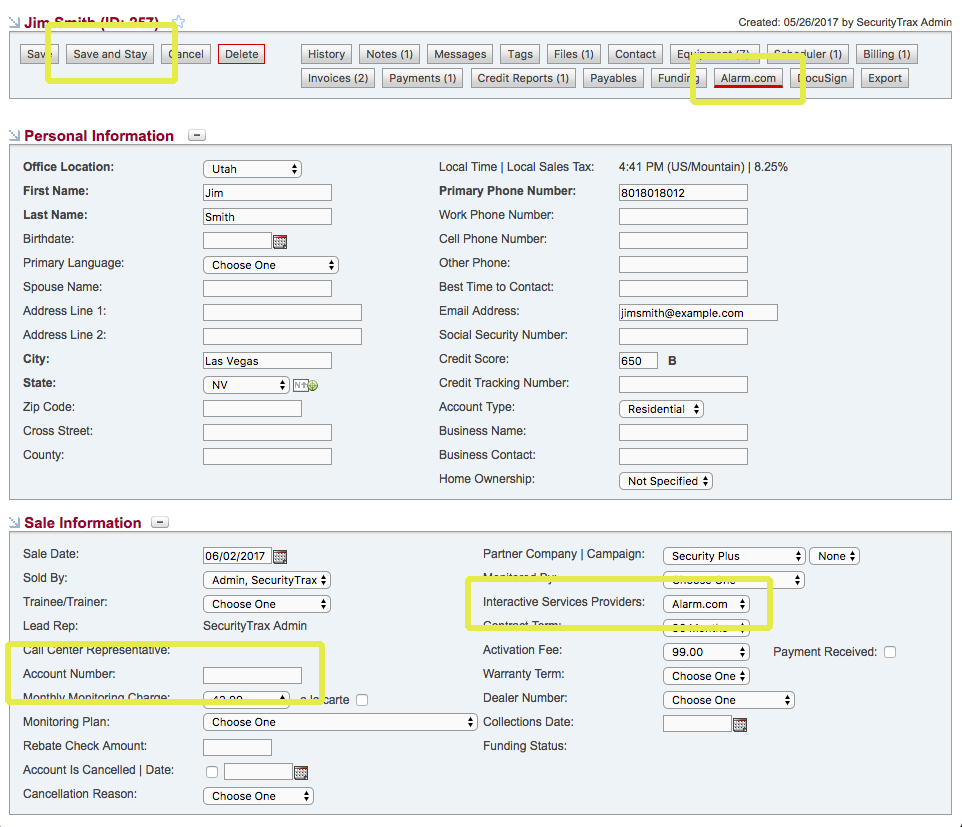
- To push a new customer account to Alarm.com select the appropriate Alarm.com account from the Interactive Services Provider drop down menu on the Customer Record.
- Enter the correct Account Number (CS Number or Monitoring ID)
- Click Save and Stay. The Alarm.com tool will then be displayed. The red line signifies that the customer account has NOT been pushed to Alarm.com.
- Click the Alarm.com tool
The Alarm.com Popup Window
If you're familiar with the Alarm.com Dealer Site you'll recognize the options presented in the pop up window.
- Enter the appropriate selections based on the type of system installed
- Click Save to trigger three processes:
Push
The customer account will be Pushed to the respective Alarm.com Dealer Site account.
LINK
A Link will be established so if key pieces of data are changed within SecurityTrax on the customer account they'll also be updated on the Alarm.com Dealer Site automatically.
ACTIVATE
The customer account will be acivated on the Alarm.com Dealer Site.
NOTE: The radio buttons at the top for 'Create Customer' and 'Create Commitment'. Toggling between the two changes which fields are required. While both are supported, it's more common to see dealers skip the 'Create Commitment' step and opt to 'Create Customer' once all of the customer information has been entered into SecurityTrax.
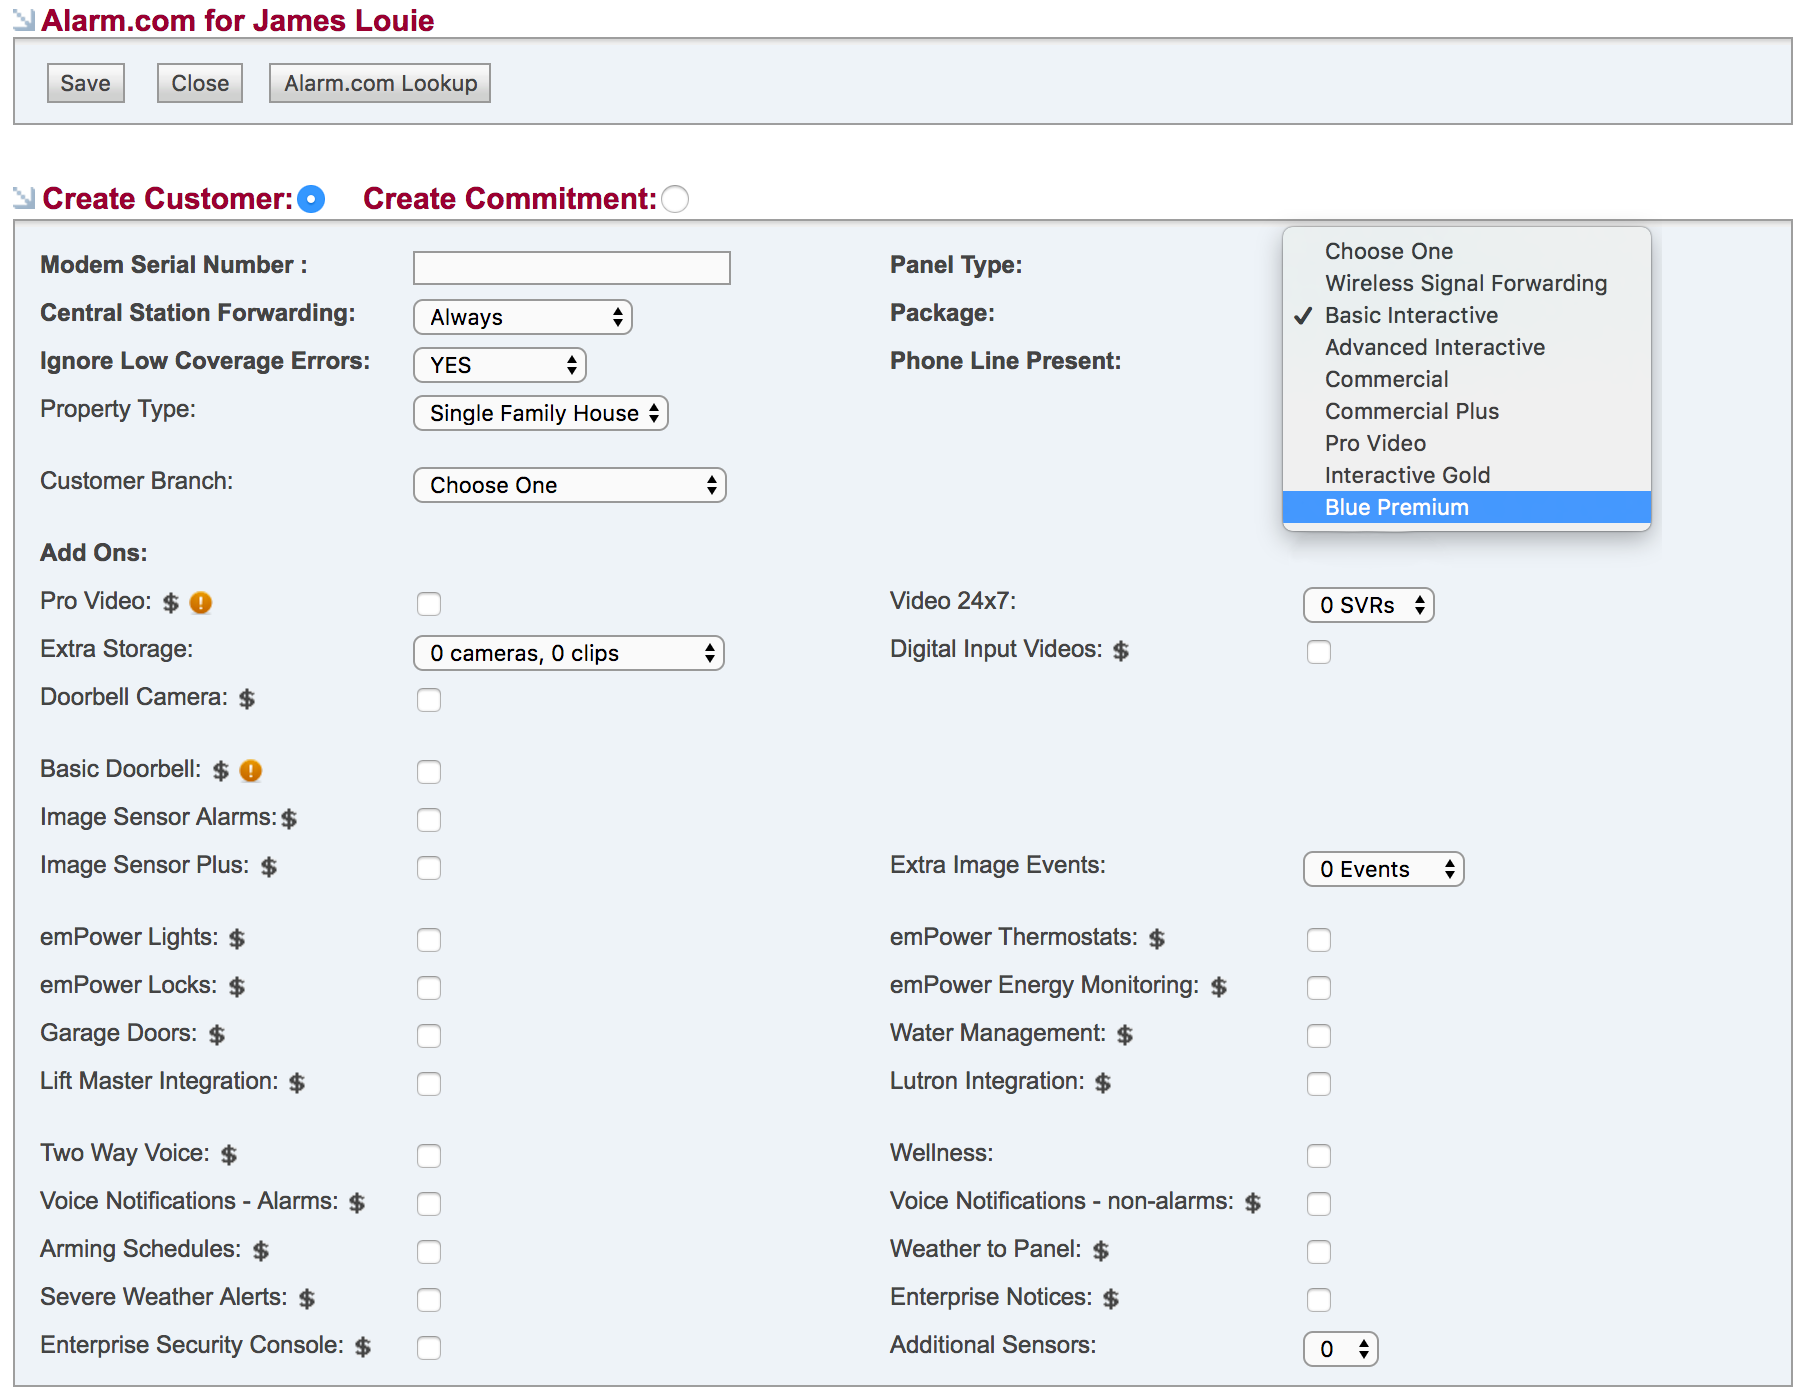
In the "Package" drop down list customized packages that have been created on Alarm.com's site will also show up here.
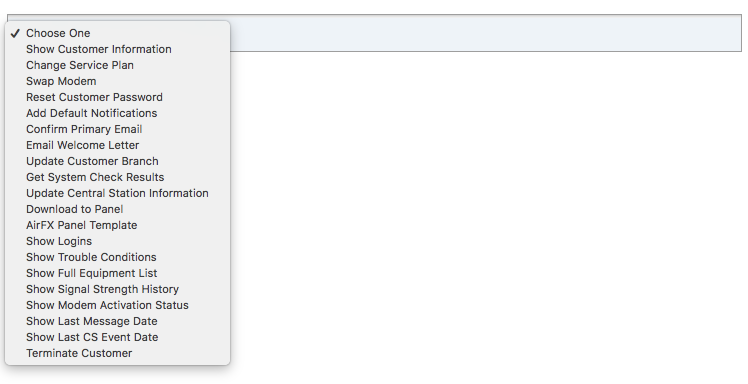
Post Account Push Menu
Clicking the Alarm.com tool on the Customer Record after pushing the account to Alarm.com displays several options, including Email Welcome Letter, Reset Customer Password, etc.
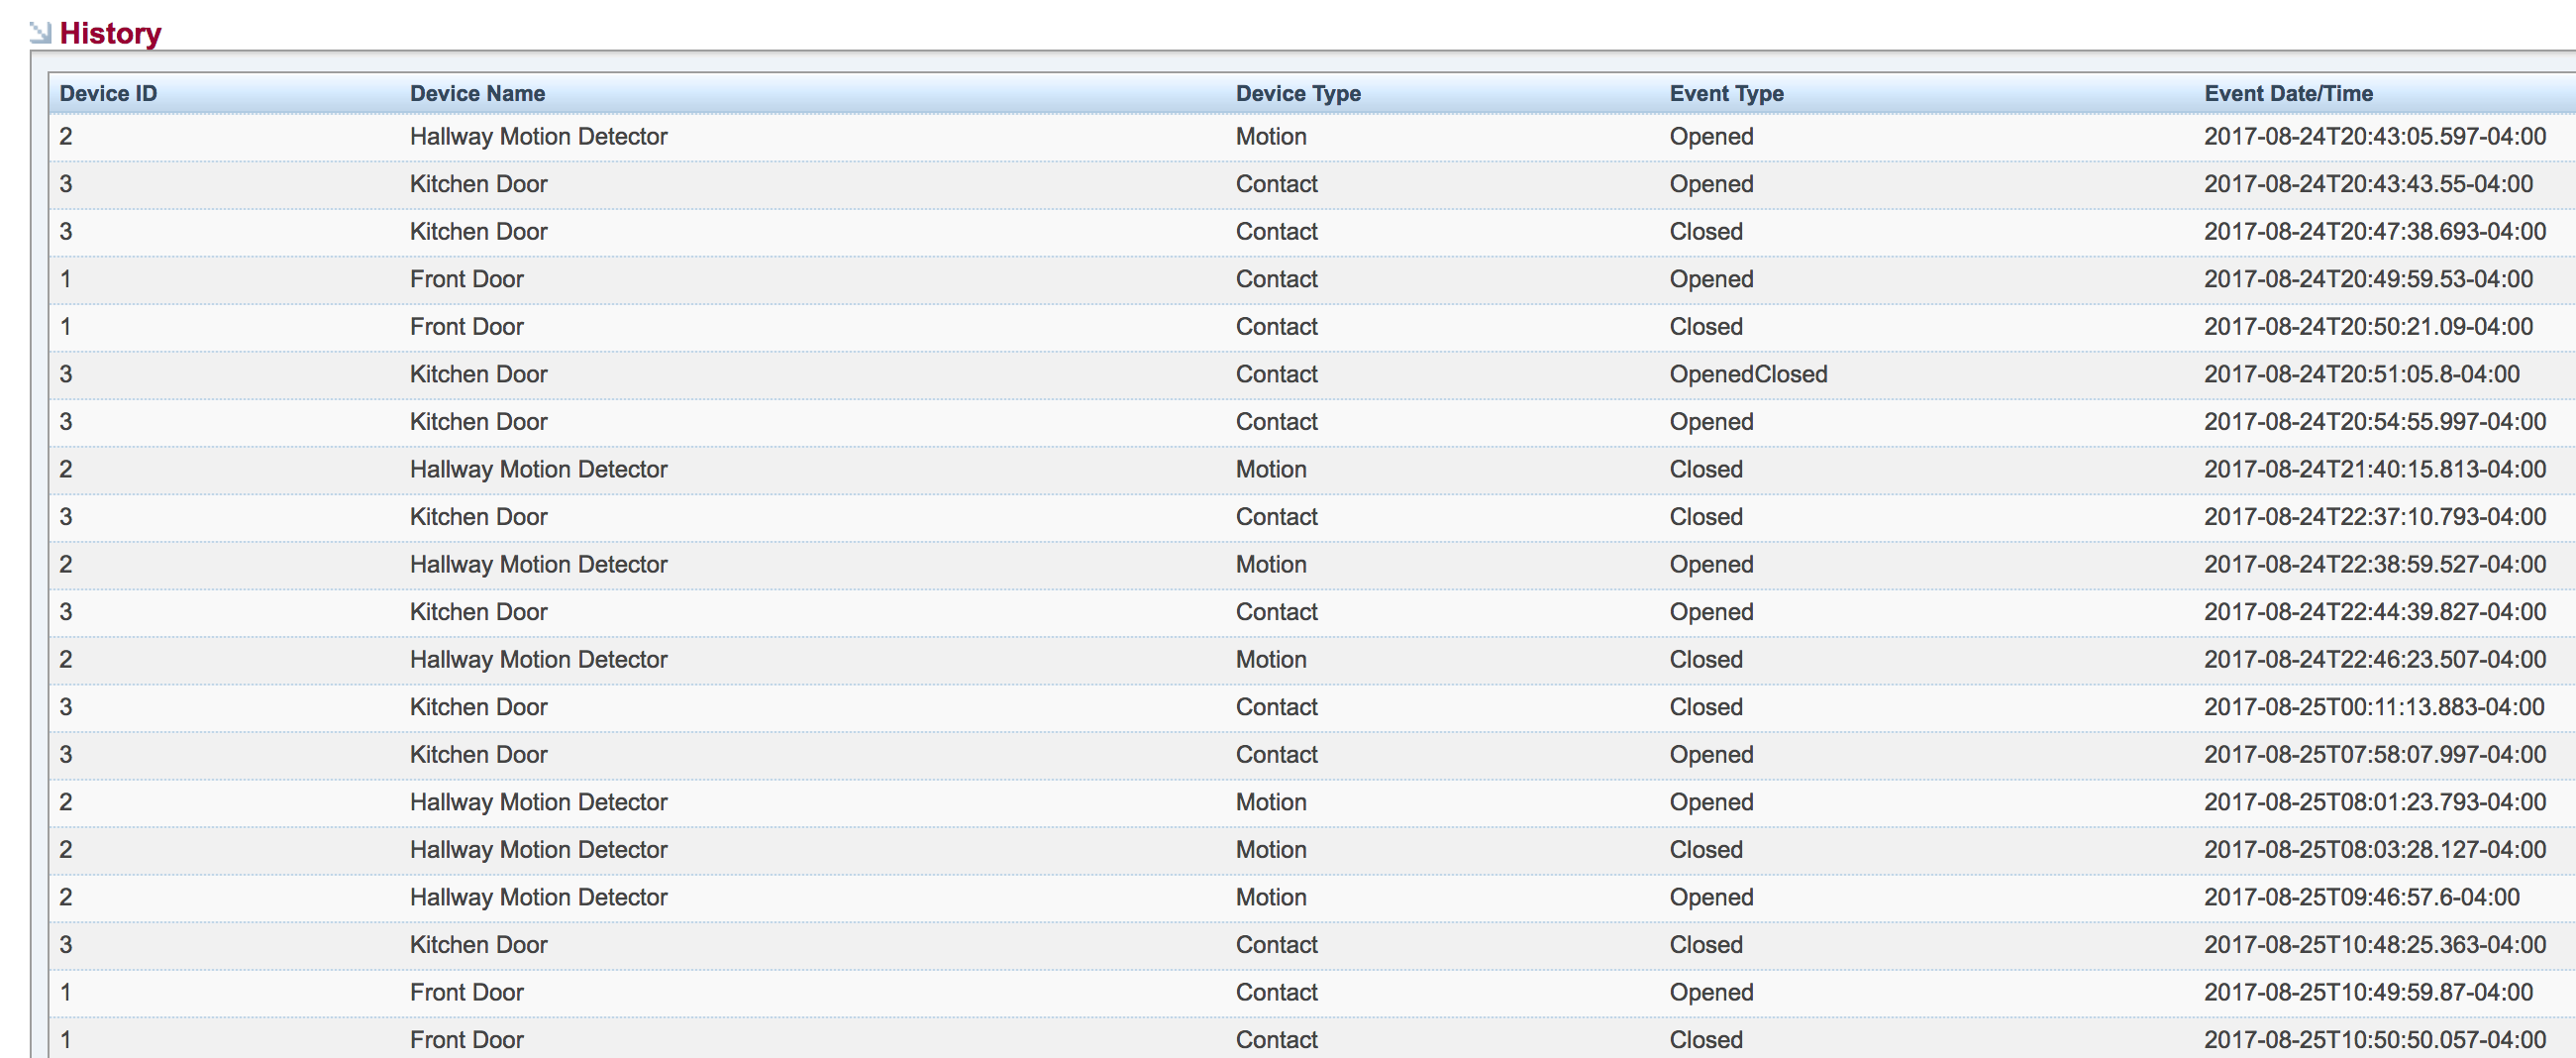
ADC Signal History
Look up the customer's Alarm.com Signal History for a given day. Click on the ADC button and select "View Event History" in the drop down. Then select the date you want to look at and click "View History". The full 24 hrs from AM to PM of signals will show up in the window.
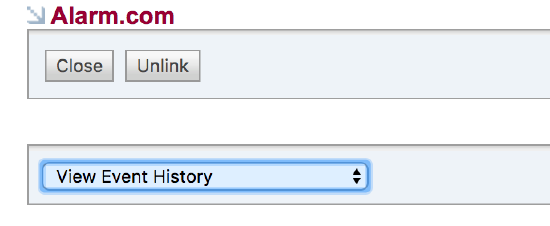
The full 24 hrs from AM to PM of signals will show up in the window.
Utilize the Seamless Login Experience
After successfully pushing a customer account to Alarm.com, a small Alarm.com logo will appear next to the first name field on a Customer Record. When clicked, a separate browser tab will open the Alarm.com System Check for the account.
From the System Check interface, the user can navigate throughout the Alarm.com Dealer Site without needing to log into Alarm.com separately.
NOTE: The name of the Sales Rep and Technician assigned to the customer in SecurityTrax are also pushed to the Alarm.com Dealer Site if the users have entered their Alarm.com credentials on their SecurityTrax user account as part of the Seamless Login Experience.

Linking Existing Accounts
SecurityTrax supports linking existing accounts on the Alarm.com Dealer Site with accounts in SecurityTrax. The steps below relate to linking single accounts. Create a SecurityTrax Ticket if you have several accounts to link.
- To link a customer account which already exists on the Alarm.com Dealer Site, click Alarm.com Lookup. A search is performed behind the scenes based on the account number and email address.
A list of possible matches will be displayed. Select the correct match and a link will be created between the customer account in SecurityTrax and the Alarm.com Dealer Site.
- Click Save