Customer Guide
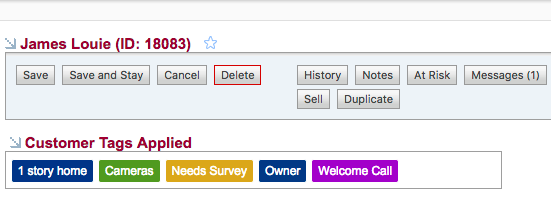
When you are on a Customer record, there are many buttons that provide additional information and features for that Customer, below we will outline the purpose of each button.
History
This allows the user to view a comprehensive log of all changes to the customer. Here the user can see what was changed, when it was changed, and who made the changes.
Notes
In this window, the user can create notes or tickets. These stay on the customer when they are created. Tickets can be assigned to yourself or other users. These tickets are used to follow up with customer's needs. With these tickets and notes, the user can remember communications and tasks associated with the customer.
Messages
Create email and SMS text message templates to send to your Leads and Customers. Message Campaigns in SecurityTrax are Static or Dynamic emails and SMS text messages that you create ahead of time. They save hours of work and help maintain a consistent voice throughout all communications to your Leads and Customers. Go to Managing Message Campaigns to learn how to set these up.
Tags
Use Tags to keep track of anything you can think of. Just type in the name of the Tag to be tracked and click save.
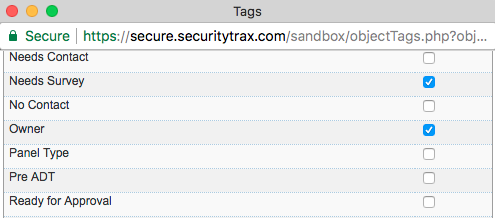
When the customer page is refreshed the Tags will show up on the customer.
Files
Here the user can store files on the customer. These can be images, documents, or any other type of file.
Contacts
This is where the user can input and save the emergency contacts for the customer. The user may save as many contacts as needed for the customer. The user can also add Police, Fire, and Medical contacts, however many of our integrations will help add these by looking them up and having the user click on the appropriate one.
Equipment
Equipment can be added to a customer in a few different ways. One way is by adding a piece of equipment individually. This is done by:
- Click on the "Equipment" button and this opens the customer equipment screen
- Choose the person's name that sold the equipment in the drop down to the right of "Sold By:"
- Then choose the piece of equipment from the drop-down to the right of "Equipment:"
- Edit the quantity if you want to add more than one
- Add the zone if applicable
- Add the zone number if applicable
- Click Save and this will add the piece/s of equipment to the customer

The faster way to add equipment is to add a Package of equipment. When adding a package all the pieces of equipment associated with it will be added at the same time. First, choose who sold the equipment and then select the appropriate package from the drop-down and then click save. Every piece of equipment in that package is now on the customer record.
To learn how to create these Equipment Packages click here.
Invoice to Equipment Conversation
Invoices with equipment created on a lead or customer can now be converted to equipment on the customer's equipment screen. Create as many quotes as needed to show pricing scenarios, then convert the desired quote to an invoice. After an invoice has been created and the lead has been converted to a customer:
- Open the customer Equipment screen
- The "Add Invoiced Equipment" button will show up on the equipment screen
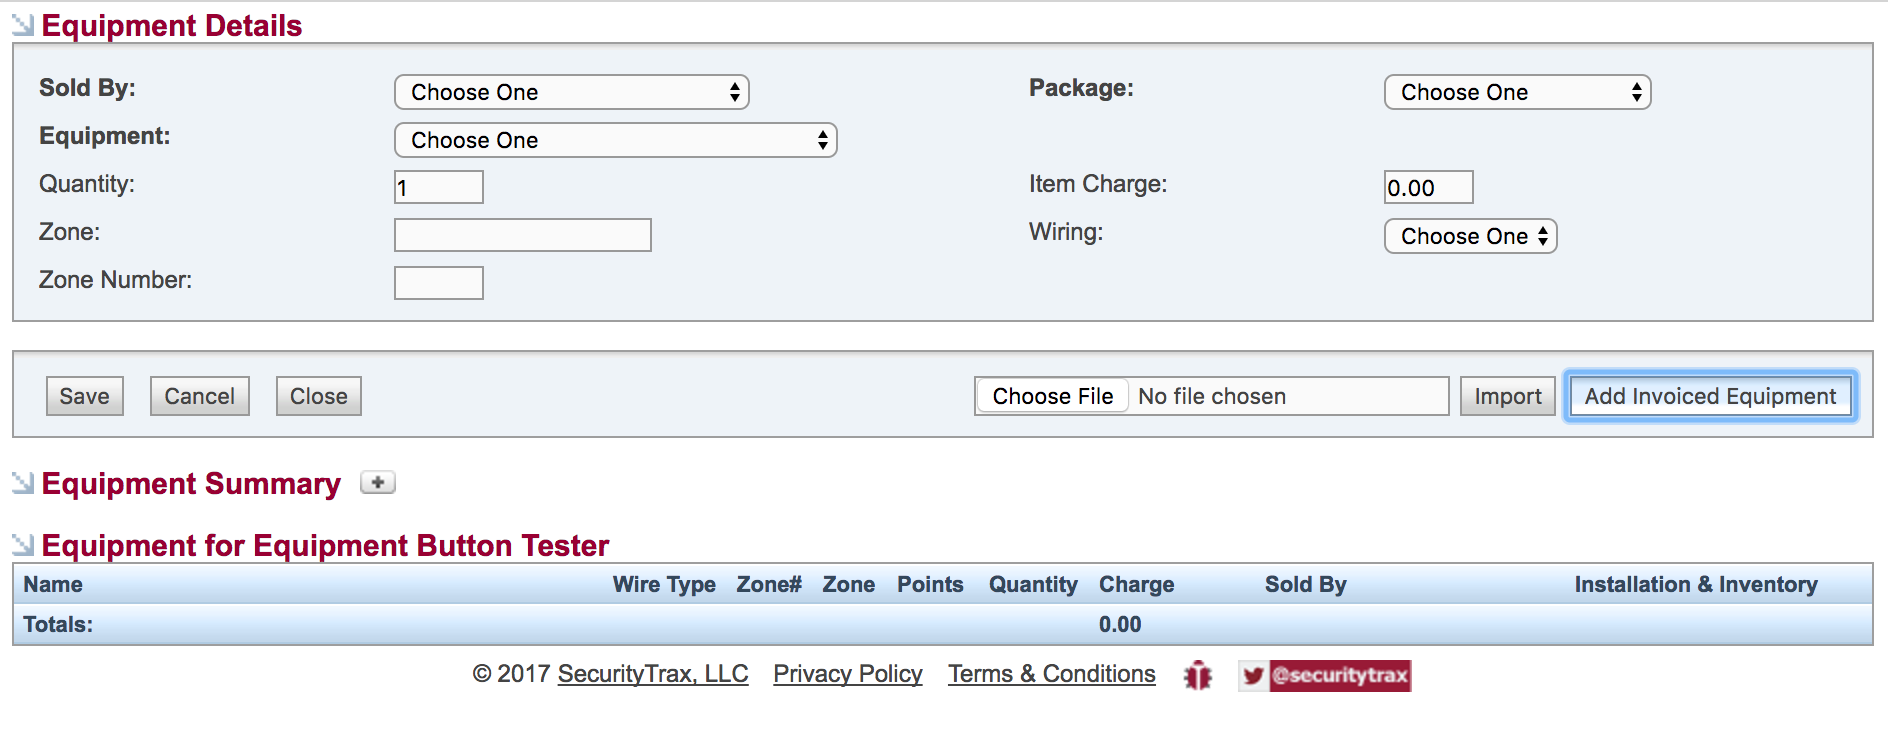
- Click on this button to bring final invoice items to the equipment profile
When this button is used it will get the equipment from all existing invoices that haven't been previously converted. Also, Activation Fees and Monthly Monitoring Rates will not be pulled or changed on the customer.
Scheduler
Schedule technicians for Install, service, and removal appointments on a customer. Watch a short video on how this is done by clicking here.
Billing
Want to get paid? Add a credit card, bank account, or select manual billing on this screen. The payment method that you mark as default will be the method used for recurring billing.
Invoices
SecurityTrax provides an easy way to send Invoices or Quotes to a customer for any products, labor, services, etc. provided. The Invoices feature can also be used to bill a customer on a recurring basis.
TERMS TO KNOW BEFORE YOU START
Invoice
An Invoice which has been created manually, or an Invoice which has been created automatically from a Recurring Invoice.
Recurring Invoice
A "template" from which an Invoice is created on a regular, scheduled basis.
Quote
An Invoice which is not billable and cannot have payments associated with it.
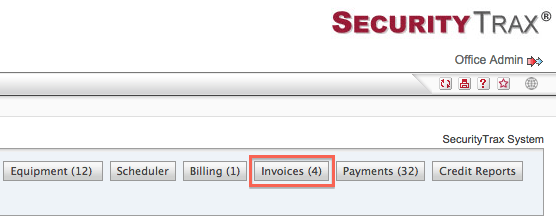
If you have permission to view Invoices you will have an "Invoices" button on the page for all customers that you have permissions to view. Click this button to use the Invoice feature.

After clicking on the "Invoices" button, the top of the window that pops up will contain a list of all the Invoices that have been created for the customer, along with information pertaining to each Invoice.
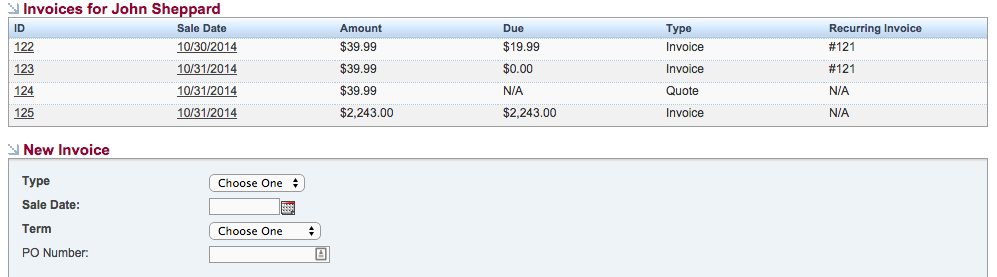
DESCRIPTIONS
ID
The unique identifier for the Invoice, set by SecurityTrax when the Invoice is created.
Sale Date
The Sale Date of the Invoice.
Amount
The total amount that the Invoice is for.
Due
The unpaid Amount associated with the Invoice.
Type
Either "Invoice" or "Quote". See above for the definition of a Quote.
Recurring Invoice
The ID of the Recurring Invoice that the Invoice was created from, or "N/A" if the Invoice was created manually. See above for the definition of a Recurring Invoice.
Creating Invoices
If you have permission to create invoices for a lead or customer you can begin this process by clicking on the "Invoices" button on the lead or customer page on the main site. You can also create an invoice on the mobile site for both leads and customers. Quotes and credits can also be created with this tool.
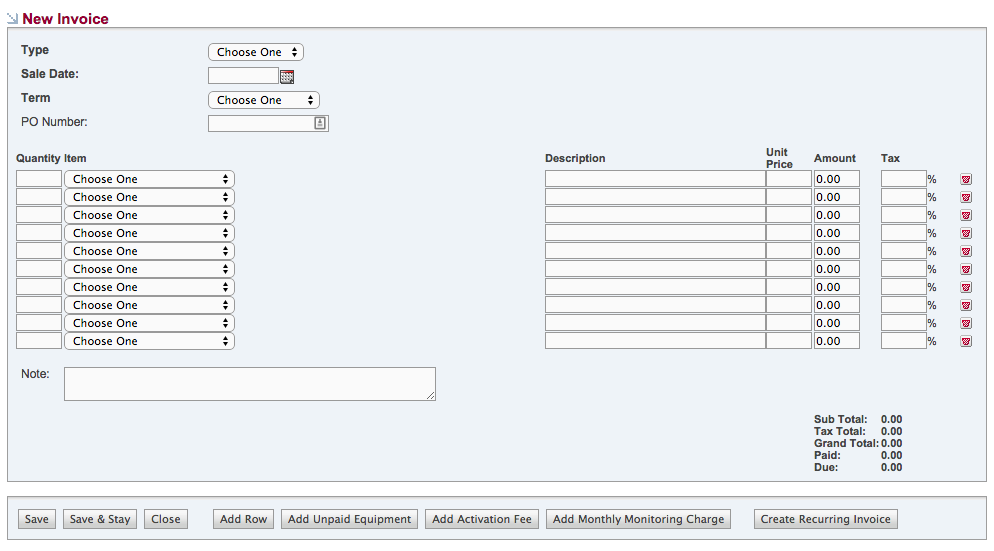
In the lower section of the window that pops up, several fields are present.
DESCRIPTIONS
Type
Required Field. Specify whether you are creating an Invoice or a Quote.
Sale Date
Required Field. Specify the Sale Date for the Invoice/Quote.
Term
Required Field. Specify the Term of the Invoice/Quote (Note: A Quote is never "due".)
PO Number
Enter the PO Number associated with this Invoice (if any).
Quantity
Specify the quantity of the Item you are adding.
Item
Specify the Item you are adding. (See the page in the "Administration" section of this website on "Invoice Billable Items".)
Description
Enter the desired description for the Item, if the default description does not suffice.
Unit Price
Specify the price-per-unit of this Item, if you wish to override the default Unit Price.
Amount
This is a read-only field representing the total of this Line Item (before tax). Amount = Quantity * Unit Price
Tax
Specify the rate this Item should be taxed at if you wish to override the default Tax. If you use the SecurityTrax Sales Tax feature, this field will be auto-populated with the customer's state tax if an override/exemption has not been specified. (See the page in the "Administration" section of this website on Accounting for help with Sales Tax Settings.)
Trash Can Icon
This is used to clear all fields of the Invoice Line Item. NOTE: If you are editing an Invoice and you click this icon, the Invoice Line Item is removed permanently!
Note
Specify any notes that you may have about this Invoice.
Sub Total
Read-only field auto-populated with the total of all Invoice Line Items before tax.
Tax Total
Read-only field auto-populated with the total tax calculated for all items.
Grand Total
Read-only field auto-populated with the sum of the Sub Total and the Tax Total fields.
Paid
Read-only field auto-populated with the amount of the Invoice which has been paid.
Due
Read-only field auto-populated with the amount of the Invoice which remains to be paid.
At the bottom of the window, there are several buttons. A description of the buttons and their function is below.

DESCRIPTIONS
Save
Saves the Invoice and returns you to the screen containing the list of all Invoices for the customer and the ability to create a new Invoice.
Save & Stay
Saves the Invoice and keeps you on the page to edit the Invoice you have just saved.
Close
Closes the window.
Add Row
Adds a new blank row to the bottom of the Invoice.
Add Unpaid Equipment
Adds all equipment on this customer not marked "Paid" and not present on another Invoice to this Invoice.
Add Activation Fee
Adds the customer's Activation Fee if it has not been marked "Paid" AND is not present on another Invoice.
Add Monthly Monitoring Charge
Adds the Monthly Monitoring Charge on the customer to this Invoice.
Create Recurring Invoice
Takes you to the screen used to create a Recurring Invoice.
If you are editing an Invoice you may also have additional buttons as shown below (depending on permissions):

DESCRIPTIONS
Cancel
Returns you to the screen containing the list of all Invoices for the Customer and the ability to create a new Invoice.
Delete
Deletes the Invoice.
Pay Invoice
Takes you to the screen on which you can enter a payment for the customer, auto-filling the Amount field with the amount Due on the Invoice.
Manage Payments On Invoice
Takes you to a screen where you can apply already-existing payments to this Invoice (or remove already existing payments from this Invoice). See below for more information on this page.
Save & Email
Saves the Invoice then sends an email of the Invoice to the email address on the customer.
Save & Print
Saves the Invoice then opens a printer-friendly version of the Invoice to be printed.(Note: Invoices can be printed in bulk from the Reports section of SecurityTrax. Also, if desired, Safari and Firefox allow you to specify to not print the URL/Date/Page #/etc. in the "Advanced" section of the Print Dialog.)
Manage Payments on an Invoice
This page is used to add/remove already-existing payments to/from an Invoice. A payment must not be applied in its entirety to another Invoice for it to show up here.
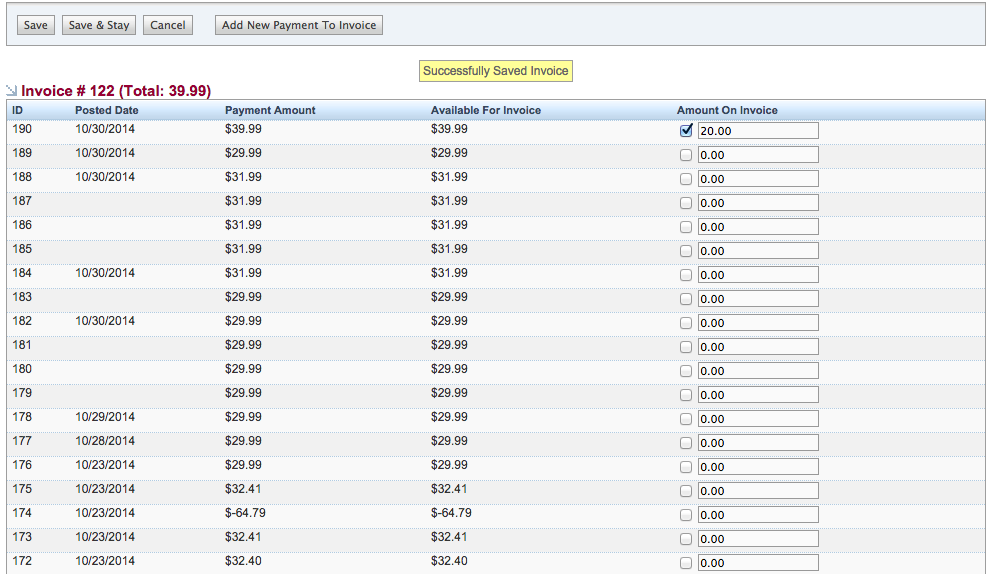
To Apply an already-existing payment to an Invoice:
- Click on the "Invoices" button on a customer.
- In the list of Invoices at the top of the window that pops up, click on the Invoice you want to pay.
- Click the "Manage Payments On Invoice" button found near the bottom of the window.
- Provided that payments that have not been wholly applied to another Invoice exist, a list of payments will appear.
- Check the checkbox in the "Amount On Invoice" column and then type in the amount of this payment to apply to the Invoice.
- Repeat the previous step until the payments applied, match the total of the Invoice (NOTE: you cannot apply an amount in excess of the total Due on an Invoice.)
- If there are insufficient funds in the available payments to pay the invoice in full you can click the "Add New Payment To Invoice" button to create a new payment to be applied to the Invoice.
- Once finished, click "Save" or "Save & Stay" to apply your changes.
Recurring Invoices
The Recurring Invoice feature within SecurityTrax allows you to create a template of Invoice and then specify when and how often you would like SecurityTrax to create and send an instance of that Invoice to the customer. This is useful in situations where recurring billing is desired.To begin the process of creating a Recurring Invoice click on the "Invoices" button on the customer's record.
In the window that pops up click the "Create Recurring Invoice" button.

The top of the window that pops up contains a list of all the Recurring Invoices that have been created for that customer, along with information pertaining to each Recurring Invoice.

DESCRIPTIONS
ID
The unique identifier for the Recurring Invoice, set by SecurityTrax when the Recurring Invoice is created.
Sale Date
The Sale Date of the first Invoice created from this Recurring Invoice.
Amount
The Amount each Invoice created from this Recurring Invoice is for.
Due
The Amount each Invoice created from this Recurring Invoice is for.
Type
The type of Invoice that will be created from this Recurring Invoice.
Creating Recurring Invoices
If you have permission to create an Invoice for a customer, begin the process of creating a Recurring Invoice by clicking on the "Invoices" button on the customer page. In the window that pops up click on the "Create Recurring Invoice" button near the bottom of the window.
Note that, once created, a Recurring Invoice CANNOT be edited. To make changes you must delete the Recurring Invoice and create a new one.
In the window, there will be several fields.
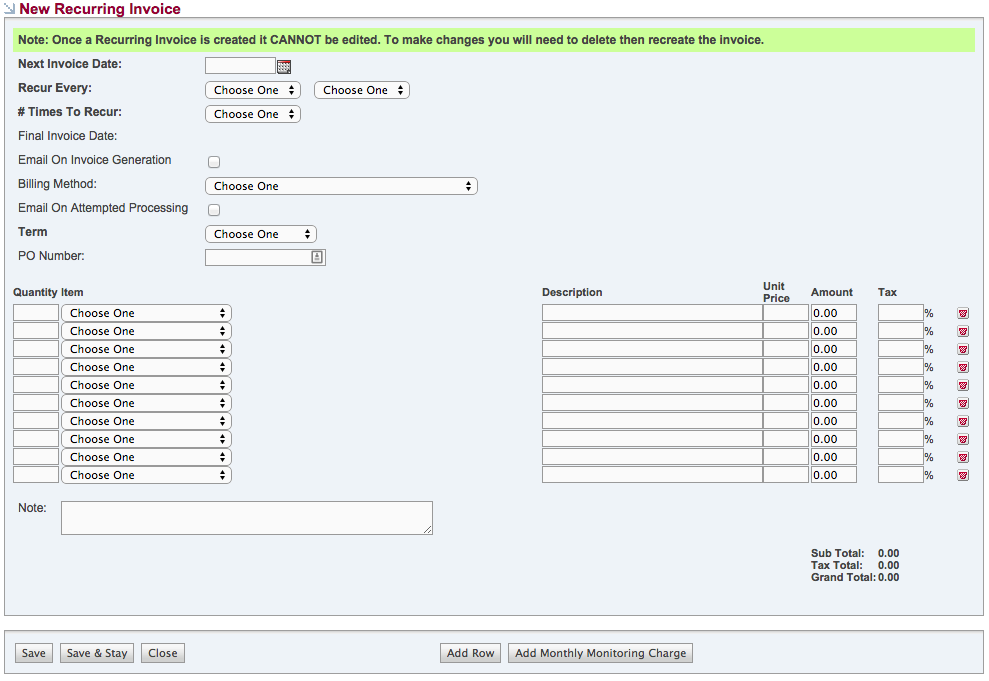
DESCRIPTIONS
Next Invoice Date
Required Field. Specify the date that you would like the first Invoice to be automatically created using this Recurring Invoice as a template. (Note: These Invoices are created by SecurityTrax at approximately 2 AM US/Mountain and the date specified in this field MUST be after today's date.)
Recur Every
Required Fields. These two drop-down menus are used to specify how often you would like SecurityTrax to create an Invoice using this Recurring Invoice as a template. For example, if you were to choose "1" in the first drop down and "Months" in the second drop down, SecurityTrax would create an Invoice every 1 Month.
# Times To Recur
Required Field. This drop-down specifies how many times you would like SecurityTrax to create the invoice at the interval specified above. If you chose "1" and "Month" in the drop-down menus above, then chose "36" in this drop-down menu, SecurityTrax would create an instance of this Recurring Invoice every month for the next 36 months.
Final Invoice Date
Read Only Field. This field will populate after you have filled in all fields above it. It displays the last date on which SecurityTrax will create an Invoice using this Recurring Invoice as a template.
Email On Invoice Generation
If checked, SecurityTrax will email the customer a copy of the Invoice every time an Invoice is created from this Recurring Invoice. (Note: The customer MUST have a valid email address in order for this feature to work.)
Billing Method
This drop-down menu will contain all of the processable billing methods on a customer. If you use the Payment Processing feature within SecurityTrax, you may choose a billing method from this drop down and SecurityTrax will automatically charge the customer for the Amount Due on the Invoices created from this Recurring Invoice when their Due Date arrives.
Email On Attempted Processing
If you use the Payment Processing feature within SecurityTrax, have specified a billing method in the drop-down menu above, and you check this box, SecurityTrax will email the customer a copy of the Invoice created from this Recurring Invoice after it has charged the billing method specified. The email sent will contain the status of the attempt to process a payment (i.e. if the charge was successful "Paid In Full" will be shown, otherwise a message stating that the payment failed will be shown on the Invoice.)
Term
Required Field. Specify the Term of the Invoice(s) that will be created from this Recurring Invoice here.
PO Number
You may enter the PO Number (if any) that you wish to associate with the Invoices created from this Recurring Invoice here.
(See the above section on "Invoices" for a description of the remaining fields and buttons.)
Customer Payment Portal
Payments
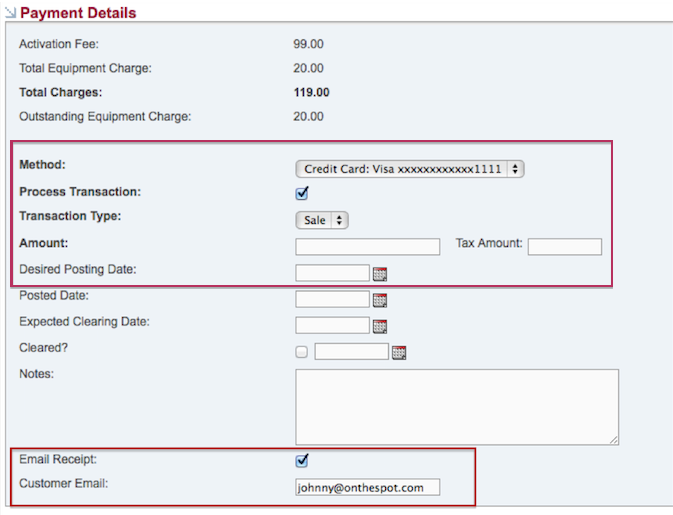
Once payment processing is activated in the SecurityTrax system you will see a change when recording a payment. At the top of the ‘Method’ drop down you will see a list of applicable billing methods from the ‘Billing’ page.
When one of the valid billing methods is chosen the ‘Process Transaction’ and ‘Transaction Type’ fields will appear.
DESCRIPTIONS
Process Transaction
If this is boxed is checked when the payment is saved it will be processed immediately. If you leave this unchecked the payment will not be processed until a later time. It can be scheduled in the future by choosing a date in the ‘Desired Posting Date’ field.
Transaction Type
Choose either sale or credit. Credit will only be an available option if the appropriate permissions have been granted.
Email Receipt
If you are processing a payment ‘now’ you will see a new field named ‘Email Receipt”. If this is selected (by default it will be if you chose that option in Global Settings and there is an email on file) then you will be shown the on-record email address for the customer. The option is available to enter a new address if necessary, however, please note that this will not change the email address on the core customer record.
Pressing 'Save' will process the transaction. The results will be displayed on the page and will indicate success or failure.
Payment Processing Permissions
There are two applicable permissions to payment processing. They are both under the Customer section.
‘Payment Processing’ is the core permission that allows for common actions to be enabled. Create and modify permissions here will allow for ‘Sale’ transactions and also refunds to take place.
The ‘Can Issue Credit’ permission should be enabled with care, as it will allow the user to push money into an account that has not been already charged.

Reviewing Processed Payments
Once a transaction is completed you will see the details and current status of the transaction in the payments list as well as when editing the payment.
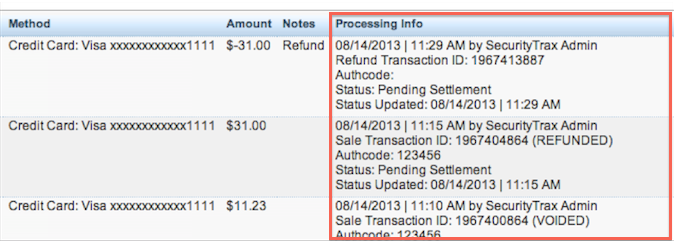
Under the Processing Info column is information provided from the processing gateway. Using the first entry as an example:
08/14/2013 | 11:29 AM by SecurityTrax Admin
When the Transaction was initiated and by whom.
Refund Transaction ID: 1967413887
Notice the transaction type prior to the transaction ID. Possible values are ‘Refund’, ‘Credit’, and ‘Sale’. If a transaction has been REFUNDED or VOIDED it will show after the transaction ID.
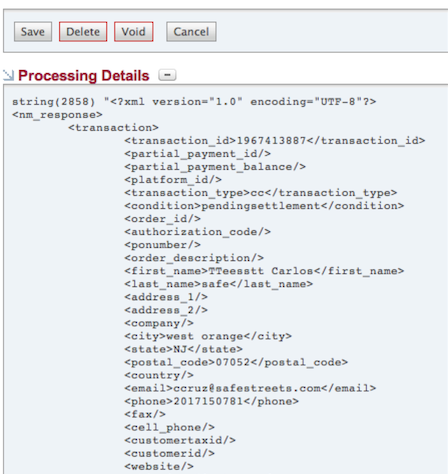
These same details will now show on the edit screen as well:
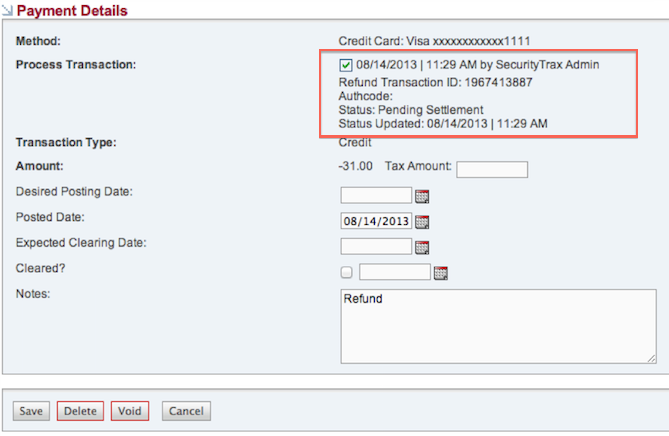
There is also a new section on the edit screen for the transaction. You will see a new section called ‘Processing Details’. This is a log of details and changes on the transaction as provided by the payment gateway. It is in XML format but will be quite easy to understand upon review.
Issuing Refunds
A transaction will be able to be refunded up until the time a transaction is ‘settled’, which will mark the transaction as ‘Complete’. Remember, this is from the gateways perspective, not from the processors. If a transaction is able to be refunded the button will show and pressing it will:
- Prompt for an amount to refund. Leaving this blank will refund the entire amount. Note that it is possible to do multiple partial refunds, however, the total amount refunded simply cannot exceed the original transaction amount.
- Mark the transaction for a refund.
- Create a new offsetting transaction that will show up on the payment list with the type of ‘Refund’. The amount will automatically match the initial transaction amount, however, will be shown as a negative amount.
Credit Reports
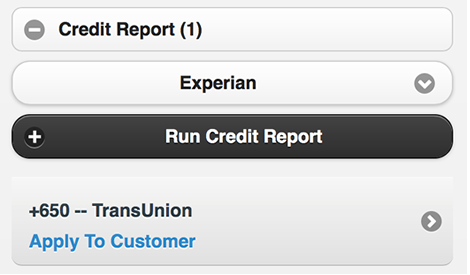
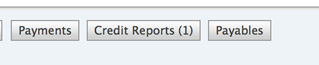
Once a valid credit bureau is added and activated in the SecurityTrax system you will see a new button on the customer (and lead) screen. The button will be called 'Credit Reports'. If credit reports have already been run in the past it will show the number of the previously run credit reports on the button:
After pressing the button the Credit Reports page will open. At the top of the page will be a drop down to select which Credit Bureau to run the credit with. If your company only has one set up, then only that one will appear in the drop-down. Select the desired bureau:
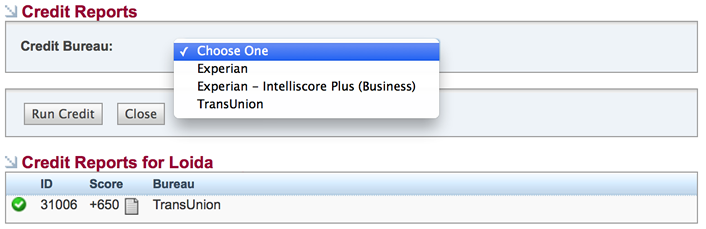
Pressing 'Run Credit' will process the credit check with the selected bureau. The results will be displayed on the screen and will indicate success or failure.
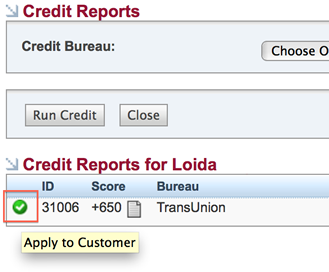
If the credit is properly run and the score is returned, you can choose to apply the returned credit score to the customer. Press the icon on the far left to apply the score to the customer:
Credit Report Setup Permissions
Setup
Getting set up to run credit reports through SecurityTrax is easy.
Simply Open a Ticket within SecurityTrax requesting access to credit reporting capabilities.
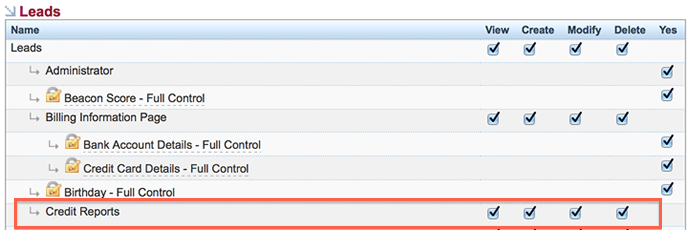
Granting Permissions
There is one applicable permission to running customer credit reports, and one for running lead credit reports. They are found on the permissions page under the Customers and Leads sections respectively. ‘Credit Reports’ is the core permission that allows for common actions to be enabled. Create permissions here will allow for the running of the credit.
Running Credit Reports in Mobile
The process of running credit in mobile is the same and provides the same functionality. It is originated from the customer or lead page: