2) Prepare Account for COPS Monitoring
Follow the steps below in SecurityTrax to prepare the customer account to be pushed to the COPS Monitoring platform:
Customer Account Setup
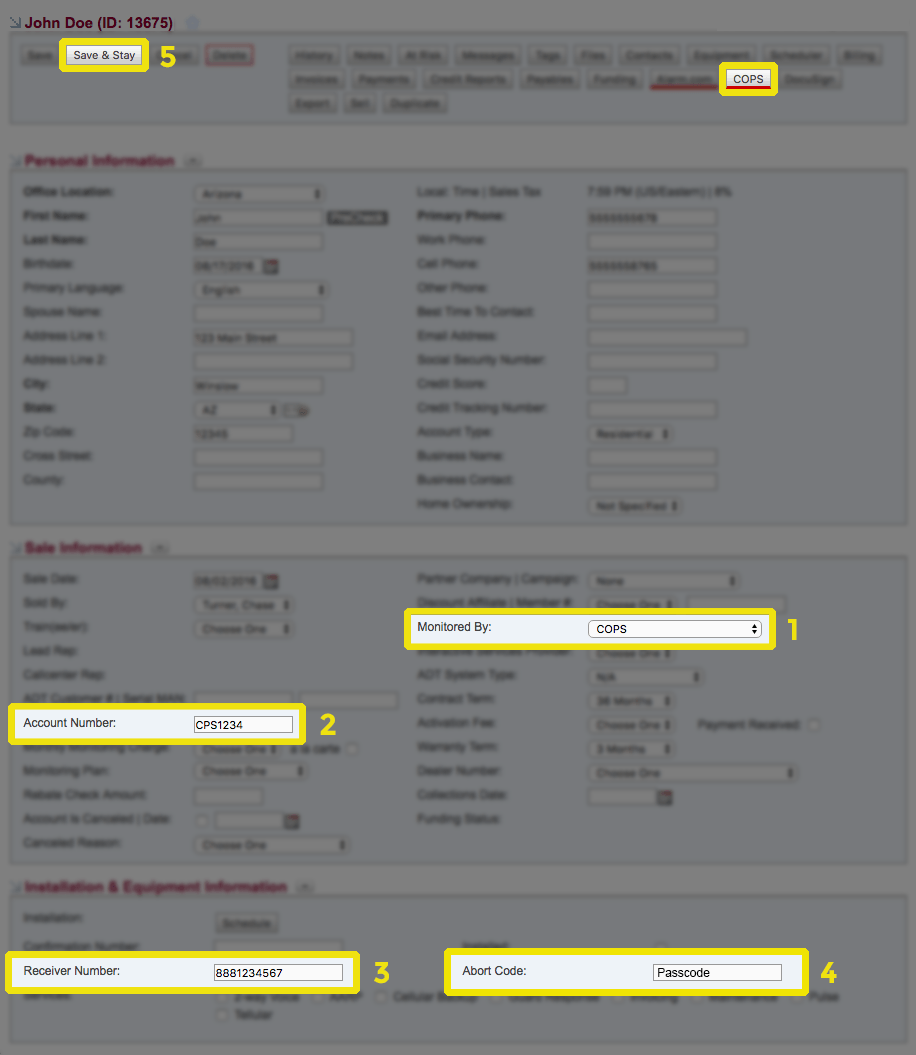
- Select your COPS Monitoring Company. This enables the COPS button to display at the top of the Customer Record in SecurityTrax (will be discussed in a later step).
- Enter the Account Number
- Enter the Receiver Number
- Enter the Abort Code (Customer's Passcode)
- Click Save & Stay

Responding Parties
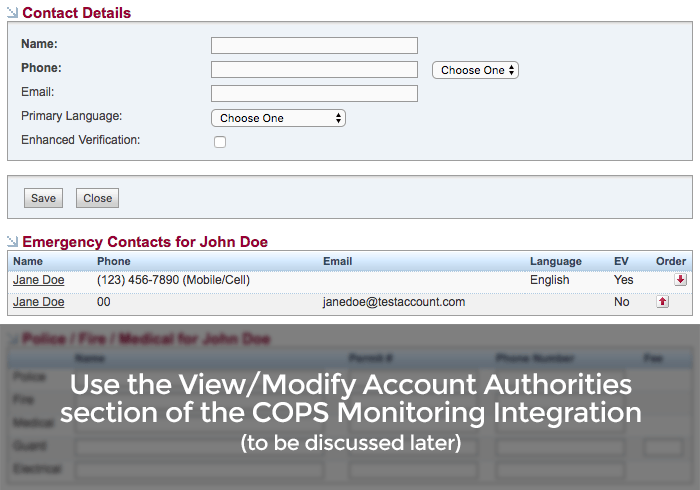
The Responding Parties are entered by clicking on Contacts found at the top of a Customer Record in SecurityTrax.
- Click the Contacts button
- Enter the Name and Phone, then select the Description and Primary Language (optional)
- Enter an email address (if applicable) as a separate entry using '00' for the phone number.
- Click Save and repeat for each Responding Party


NOTE: It's not necessary to enter any of the Police / Fire / Medical information. This information will be found in the View/Modify Account Authorities section of the COPS Monitoring integration after the customer account has been initially pushed to COPS Monitoring.
Zones
The Zone Numbers and Zone Descriptions are entered by clicking Equipment found at the top of a Customer Record in SecurityTrax.
- Click the Equipment button
- Select the appropriate value in the Sold By drop down menu
- Select the applicable piece of Equipment and enter the Quanity, or select a Package
- Enter a descriptive 'Zone Description' in the 'Zone' field
- Enter a 3 digit 'Zone #' in the 'Zone Number' field (must be 3 digits - ex. '001', '002', etc.)
- Click Save


NOTE: Each piece of equipment must be marked as Installed in the Install Status drop down menu prior to shelling the account with COPS Monitoring.
Next Steps
This concludes the setup and account preparation for the COPS Monitoring integration. The next steps provide details about how to put it to work.
