1) Content Management
Using the directions on the sub-pages that follow for each item, enter the applicable information for your company. The values you enter for each item will show up in the drop down menus found on a Customer Record (See Onboarding: Definitions).
Typically, these values would only need to be entered once, but ongoing updates may be necessary as processes or policies change at your company.
Customer Cancellation Reasons
Explanations about why a customer cancelled their contract.
REMINDER: All BOLD fields are required in order to save.
- Click on the Administration tab
- Click Customer Cancellation Reasons under Content Management
- Click Add Cancellation Reason located directly beneath the main tabs at the top
- Enter a Name
- Enter a Dealer Code (if applicable). These codes are used by Central Stations to categorize why a customer has cancelled. Reports can easily be created to correlate with Central Station codes.
- Verify the Active checkbox is checked
- Click Save
- Repeat for each Customer Cancellation Reason
Examples include 'Moving', or 'Went with another company', but any value could be entered.
Dealer Numbers
The unique number(s) you received from those paying you for accounts you generate.
REMINDER: All BOLD fields are required in order to save.
Create email and SMS text message templates to send to your Leads and Customers. Message Campaigns in SecurityTrax are Static or Dynamic emails and SMS text messages that you create ahead of time. They save hours of work and help maintain a consistent voice throughout all communications to your Leads and Customers.
Emails and SMS text messages can be the same each time they're used (STATIC) OR updated automatically based on the context in which they are sent by using Fields to retrieve information already entered into SecurityTrax (DYNAMIC).
For example, a STATIC message could look like this:
- Click on the Administration tab
- Click Dealer Numbers under Content Management
- Click Add Dealer Number located directly beneath the main tabs at the top
- Enter a Name
- Enter a Dealer Number
- Verify the Active checkbox is checked
- Click Save
- Repeat for each Dealer Number
Funders
Identify and setup how your dealership will be compensated by those purchasing the contracts from you, if applicable. This will be discussed in the OnBoarding Steps: Supplemental Tasks.
Managing Message Campaigns
Create email and SMS text message templates to send to your Leads and Customers. Message Campaigns in SecurityTrax are Static or Dynamic emails and SMS text messages that you create ahead of time. They save hours of work and help maintain a consistent voice throughout all communications to your Leads and Customers.
Emails and SMS text messages can be the same each time they're used (STATIC) OR updated automatically based on the context in which they are sent by using Fields to retrieve information already entered into SecurityTrax (DYNAMIC).
For example, a STATIC message could look like this:

Or, by using Fields, your DYNAMIC message could look like this:
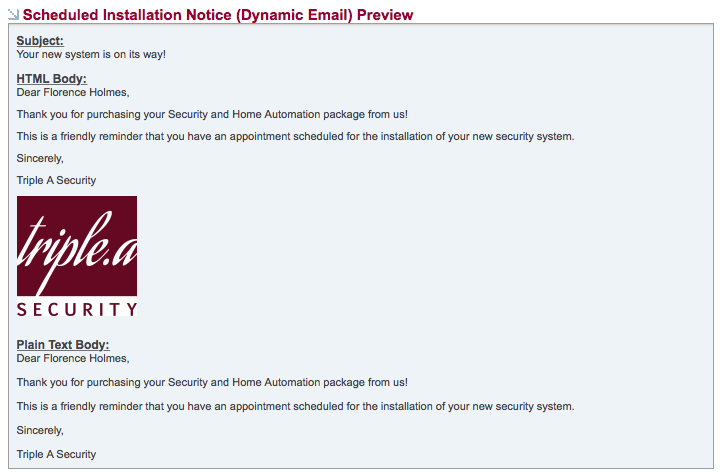
The Dynamic message example above uses a 'Customer Object' Field to automatically place 'Florence Holmes' (the customer) in the message. There are a variety of message 'Objects' available. Each Object Type will be explained on the pages that follow.
We'll explain how both Email and SMS Text Messages are created in SecurityTrax, plus show samples of the wide variety of Dynamic messaging types available and provide the Fields to use for each message type.
NOTE: SMS Test Messages must be enabled. A $0.05 per message charge will be incurred by sending SMS text messages to Leads and Customers. There is no charge for sending emails.
Creating Message Campaigns
To begin creating an Email or SMS Text Messaging Campaign, follow the steps below in SecurityTrax:
Creating an Email Message Template
- Click on the Administration tab
- Click Message Campaigns under Content Management
- Click Add Message located directly beneath the main tabs at the top
- Select the Type of message (Lead or Customer)
- Select Email from the the Message Type drop down menu
- Enter a Name for the message
- Enter the Email Subject
- Enter the name you'd like to show as the sender
- Enter the email address you'd like to show as the sender. (For example, 'noreply@yourcompany.com')
- Create your content in the HTML Body field using the editor
- Create a duplicate of the content in the Plain Text Body field
- Click Save
Creating an SMS Text Message Template
- Click on the Administration tab
- Click Message Campaigns under Content Management
- Click Add Message located directly beneath the main tabs at the top
- Select the Type of message (Lead or Customer)
- Select SMS from the the Message Type drop down menu
- Enter a Name for the message
- Create the content of your text message
- Click Save
The following pages include the various types of messages available, their respective Fields, and samples for how the Fields are used.
Customer Objects
'Customer Objects' retrieve information from the Customer Record to display in the message (i.e. Name, Address, Phone, etc.). The image below provides a sample.
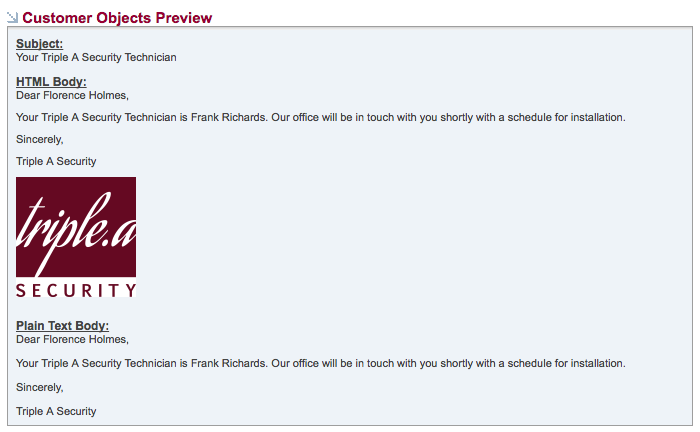
Here is what was entered into the SecurityTrax Message Editor to create the sample above:
Dear %%[customer][getFlname]%%,
Your Triple A Security Technician is %%[customer][getInstallTechFlname]%%. Our office will be in touch with you shortly with a schedule for installation.
Sincerely,
Triple A Security
Note the proper format when using Objects and Fields. Begin with two percentage symbols %% followed by the Object Type [customer] followed by the desired Field [getFlname] in this case, then end with two more percentage symbols %%.
The table below contains the Fields available for Customer Objects:
|
ITEM |
FIELD NAME |
DEFINITION |
SAMPLE (where applicable) |
|
1a |
[getFname] |
Customer's first name |
|
|
2a |
[getLname] |
Customer's last name |
|
|
3a |
[getId] |
The SecurityTrax ID of the Customer |
|
|
4a |
[getFlname] |
Customer first and last name |
|
|
5a |
[getLfname] |
Customer's last name, first name |
|
|
6a |
[getLeadCompanyName] |
Name of Partner Company or Lead Source on the Customer |
|
|
7a |
[getLeadCompanyCampaignName] |
Name of the campaign used by the partner company or Lead source |
|
|
8a |
[getLocationName] |
The office location where the Customer originated |
|
|
9a |
[getLocation_id] |
The SecurityTrax ID of the Office Location |
|
|
10a |
[getLead_company_id] |
SecurityTrax ID for the Lead Company |
|
|
11a |
[getLead_company_campaign_id] |
SecurityTrax ID for the Campaign used under the Lead Company |
|
|
12a |
[getAccount_num] |
The Customer account number |
|
|
13a |
[getAccount_type] |
Residential or commercial account type |
Residential or Commercial |
|
14a |
[getAddress1] |
Customer's first street address line |
|
|
15a |
[getAddress2] |
Customer's second street address line |
|
|
16a |
[getCity] |
Customer's city |
|
|
17a |
[getState] |
Customer's state |
XX |
|
18a |
[getZip] |
Customer's zip code |
12345 |
|
19a |
[getSalesRepFlname] |
Customer's sales representative |
|
|
20a |
[getLeadRepFlname] |
Customer's lead respresentative |
|
|
21a |
[getBillingTypeName] |
Billing method Customer uses to pay for services |
Credit Card, Bank Account, or Invoicing |
|
22a |
[getMmrAmount] |
Customer's Monthly Monitoring Rate |
|
|
23a |
[getEquipmentTotalPoints] |
Points genrerated from Customer's equipment |
|
|
24a |
[getPhone1Formatted] |
Customer's Primary phone number |
456-7890, (123) 456-7890, or (123) 456-7890 x000 depending on what is in SecurityTrax for Customer |
|
25a |
[getPhone2Formatted] |
Customer's Cell phone number |
456-7890, (123) 456-7890, or (123) 456-7890 x000 depending on what is in SecurityTrax for Customer |
|
26a |
[getPhone3Formatted] |
Customer's Work phone number |
456-7890, (123) 456-7890, or (123) 456-7890 x000 depending on what is in SecurityTrax for Customer |
|
27a |
[getPhone4Formatted] |
Customer's Other phone number |
456-7890, (123) 456-7890, or (123) 456-7890 x000 depending on what is in SecurityTrax for Customer |
|
28a |
[getPhone1] |
Customer's primary phone number |
456-7890, (123) 456-7890, or (123) 456-7890 x000 depending on what is in SecurityTrax for Customer |
|
29a |
[getPhone2] |
Customer's cell phone number |
456-7890, (123) 456-7890, or (123) 456-7890 x000 depending on what is in SecurityTrax for Customer |
|
30a |
[getPhone3] |
Customer's work phone number |
456-7890, (123) 456-7890, or (123) 456-7890 x000 depending on what is in SecurityTrax for Customer |
|
31a |
[getPhone4] |
Customer's other phone number |
456-7890, (123) 456-7890, or (123) 456-7890 x000 depending on what is in SecurityTrax for Customer |
|
32a |
[getInstallDateTimeFormatted] |
Customer's installation date and time |
|
|
33a |
[getInstallDateFormatted] |
Customer's installation date |
|
|
34a |
[getInstallStartTime] |
Customer's installation start time |
|
|
35a |
[getConfirmation_num] |
The Customer's confirmmation number provided from the central station |
|
|
36a |
[getInstallTechFlname] |
The name of the technician on the primary install appointment |
|
|
37a |
[getCompanyProfileName] |
The company name displayed after logging into SecurityTrax |
ABC Security |
|
38a |
[getMonitoringCompanyName] |
The name of the company that monitors Customer's security system |
|
|
39a |
[getEmail] |
The Customer email address |
|
|
40a |
[getLeadTypeName] |
The status of a Lead or 'Customer' if Customer |
|
|
41a |
[getLead_created] |
The date and time the lead was created in SecurityTrax |
0000-00-00 00:00:00 |
|
42a |
[getCreated] |
The date and time the customer was created in SecurityTrax |
0000-00-00 00:00:00 |
|
43a |
[getTermMonths] |
Customer's contract term in months |
|
|
44a |
[getActivationFeeAmount] |
Customer's activation fee (installation fee) |
|
|
45a |
[getAdt_customer_number] |
Customer's ADT Customer number |
|
|
46a |
[getAdt_serial_man] |
Customer's ADT Serial MAN |
|
|
47a |
[getLeadCallbackDatetimeNotificationsFormat] |
The Lead's callback date and time formatted for a Notification |
00/00/0000 00:00:00 AM or PM |
|
48a |
[getDealerNumberNumber] |
Only the number portion of the Dealer Number description |
|
|
49a |
[getMonitoringPlanName] |
Displays the Monitoring Plan selected on the Customer Record. |
Tech Schedule Objects
'Tech Schedule Objects' use Technician appointments created for a Customer as a reference from which to pull information for the message. If there are multiple appointments, you can select a specific appointment (i.e. Appointment Date and Time, and Technician Name).
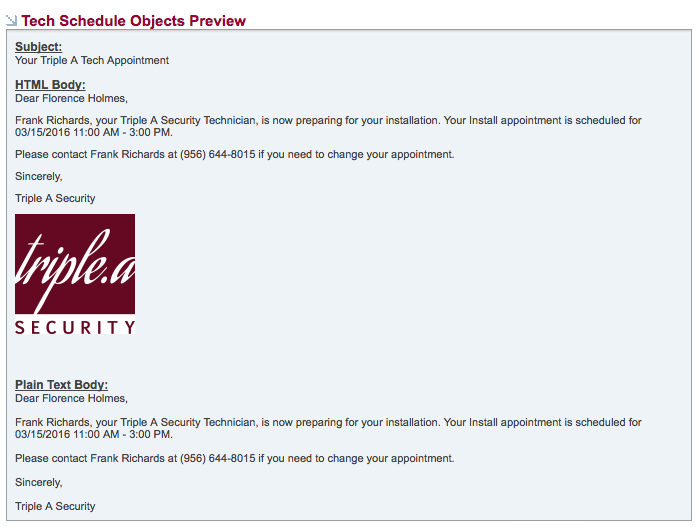
Here is what was entered into the SecurityTrax Message Editor to create the sample above:
Dear %%[tech_schedule][getCustomerFlname]%%,
%%[tech_schedule][getUserFlname]%%, your Triple A Security Technician, is now preparing for your installation. Your %%[tech_schedule][getServiceTypeName]%% appointment is scheduled for %%[tech_schedule][getFullAppointmentDateTime]%%.
Please contact %%[tech_schedule][getUserFlname]%% at %%[tech_schedule][getUserCellPhoneFormatted]%% if you need to change your appointment. Sincerely,
Triple A Security
Note the proper format when using Objects and Fields. Begin with two percentage symbols %% followed by the Object Type [tech_schedule] followed by the desired Field [getUserFlname] in this case, then end with two more percentage symbols %%.
The table below contaings the Fields available for Tech Schedule Objects:
|
ITEM |
FIELD NAME |
DEFINITION |
SAMPLE (where applicable) |
|
1b |
[getID] |
The SecurityTrax ID of the Appointment |
|
|
2b |
[getStartTime] |
The start time of day for the appointment |
00:00 AM or PM |
|
3b |
[getStartDate] |
The date of the appointment |
00/00/0000 |
|
4b |
[getEndTime] |
The end time of day for the appointment |
00:00 AM or PM |
|
5b |
[getServiceTypeName] |
The name of the appointment's service type |
Install, Service or any other custom service type |
|
6b |
[getUserFlname] |
The technician's first and last name |
|
|
7b |
[getUserLname] |
The technician's last name |
|
|
8b |
[getUserUsername] |
The technician's SecurityTrax username |
|
|
9b |
[getUser_id] |
The technician's SecurityTrax ID |
|
|
10b |
[getNotes] |
Notes that refer to the appointment |
|
|
11b |
[getUser_notes] |
Notes from the technician regarding the appointment |
|
|
12b |
[getTech_service_type_id] |
The SecurityTrax ID of the appointment's service type |
|
|
13b |
[getTech_service_detail_type_id] |
The SecurityTrax ID of the appointment's service detail type |
|
|
14b |
[getServiceDetailTypeName] |
The name for the detailed description of the appointment's service type |
XX |
|
15b |
[getFullAppointmentDateTime] |
The appointment's full date and time |
00/00/0000 00:00 AM or PM |
|
16b |
[getCheckinDateTime] |
The date and time the technician checked into the appointment |
00/00/0000 00:00 AM or PM |
|
17b |
[getCheckoutDateTime] |
The date and time the technician checked out of the appointment |
00/00/0000 00:00 AM or PM |
|
18b |
[getCustomerLeadCompanyName] |
The partner company's name tied to the customer on the appoitnment |
|
|
19b |
[getCustomerLeadCompanyID] |
The partner company's SecurityTrax ID tied to the customer on the appointment |
|
|
20b |
[getMileageFromTechHome] |
The number of miles as the crow fiies between the appointment and the tech's home |
|
|
21b |
[getEnRouteToCustomerTime] |
The time the technician marked themselves as EnRoute to the appointment |
|
|
22b |
[getEnRouteToCustomerMileage] |
The number of miles as the crow flies from the EnRoute check in point to the appt. |
|
|
23b |
[getEnRouteToCustomerMileageRounded] |
The number of miles as the crow flies (rounded to a whole number) from the EnRoute check in point to the appt. |
|
|
24b |
[getCustomerFlname] |
The first and last name of the customer on the appointment |
|
|
25b |
[getCustomerFullAddress] |
The customer's full address |
|
|
26b |
[getUserCellPhoneFormatted] |
The technician's cell phone |
(000) 000-0000 x000 |
|
27b |
[getCustomerPrimaryPhoneFormatted] |
The customer on the appointment's home phone number |
(000) 000-0000 x000 |
|
28b |
[getCustomerAccountNum] |
The customer's account number |
|
|
29b |
[getCustomerNoteId] |
The SecurityTrax ID of the appointment's ticket |
|
|
30b |
[getCustomerId] |
The SecurityTrax ID of the customer on the appointment |
|
|
31b |
[getProfileName] |
The Securitytrax profile name of the company that scheduled the appointment |
|
|
32b |
[getUserImageUrl] |
A url that will display an image of the technician in the email if there is a photo in ST |
Sale Schedule Objects
'Sale Schedule Objects' use Sales Rep appointments created for a Customer as a reference from which to pull information for the message. If there are multiple appointments, you can select a specific appointment (i.e. Appointment Date and Time, and Sales Rep Name).
Here is what was entered into the SecurityTrax Message Editor to create the sample above:
Dear %%[sale_schedule][getCustomerFlname]%%,
Thank you again for your time today. I look forward to meeting you on %%[sale_schedule][getFullAppointmentDateTime]%% to further discuss your Triple A Security and home automation system.
Don't hesiate to call me with any questions at %%[sale_schedule][getUserCellPhoneFormatted]%%.
Sincerely,
%%[sale_schedule][getUserFlname]%%
Sales Representative
Triple A Security
Note the proper format when using Objects and Fields. Begin with two percentage symbols %% followed by the Object Type [sale_schedule] followed by the desired Field [getUserFlname] in this case, then end with two more percentage symbols %%.
The table below contaings the Fields available for Sale Schedule Objects:
|
ITEM |
FIELD NAME |
DEFINITION |
SAMPLE (where applicable) |
|
1c |
[getID] |
The SecurityTrax ID of the Sale appointment |
|
|
2c |
[getStartTime] |
The start time of day for the appointment |
00:00 AM or PM |
|
3c |
[getEndTime] |
The end time of day for the appointment |
00:00 AM or PM |
|
4c |
[getServiceTypeName] |
The name of the appointment's service type |
Install, Service or any other custom service type |
|
5c |
[getUserFlname] |
The Sales Rep's first and last name |
|
|
6c |
[getNotes] |
Notes that refer to the sales appointment |
|
|
7c |
[getStartDate] |
The date of the sales appointment |
00/00/0000 |
|
8c |
[getStartDateTime] |
The date and time of the sales appointment |
00/00/0000 00:00 AM or PM |
|
9c |
[getFullAppointmentDateTime] |
The sales appointment's full date and time |
00/00/0000 00:00 AM or PM |
|
10c |
[getCustomerFlname] |
The sales appointment's Customer's first and last name |
|
|
11c |
[getCustomerFullAddress] |
The sales appointment's Customer's full address |
|
|
12c |
[getUserCellPhoneFormatted] |
The Sales Rep's cell phone |
|
|
13c |
[getCustomerPrimaryPhoneFormatted] |
The Customer on the sale appointment's home phone number |
|
|
14c |
[getCustomerLeadCompanyName] |
The partner company's name tied to the Customer on the sales appointment |
|
|
15c |
[getCustomerLeadCompanyID] |
The partner company's SecurityTrax ID tied to the Customer on the sales appointment |
|
|
16c |
[getCustomerId] |
The SecurityTrax ID of the Customer on the sales appointment |
|
|
17c |
[getUserImageUrl] |
A url that will display an image of the Sales Rep in the email if there is a photo in ST |
Customer Note Objects
'Customer Note Objects' use Tickets associated with a Customer from which information is pulled for the message. Select the specific appointment to address the item found in the Ticket.
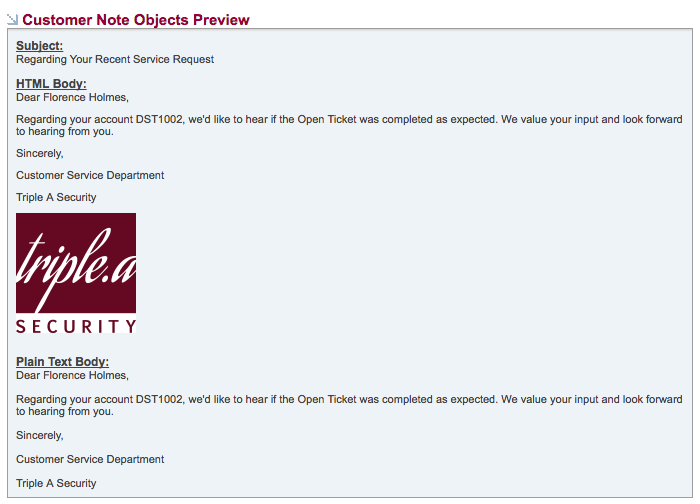
Here is what was entered into the SecurityTrax Message Editor to create the sample above:
Dear %%[customer_note][getCustomerFlname]%%,
Regarding your account %%[customer_note][getCustomerAccountNumber]%%, we'd like to hear if %%[customer_note][getTicketTypeName]%% was completed as expected. We value your input and look forward to hearing from you.
Sincerely,
Customer Service Department
Triple A Security
Note the proper format when using Objects and Fields. Begin with two percentage symbols %% followed by the Object Type [customer_note followed by the desired Field [getUserFlname] in this case, then end with two more percentage symbols %%.
The table below contaings the Fields available for Sale Schedule Objects:
|
ITEM |
FIELD NAME |
DEFINITION |
SAMPLE (where applicable) |
|
1e |
[getID] |
The SecurityTrax ID of the customer note |
|
|
2e |
[getSubject] |
The subject of the customer note |
|
|
3e |
[getNeeds_tech_schedule] |
A boolean value that indicates whether the customer note is tied to an appointment |
|
|
4e |
[getNoteTypeName] |
The name for the type of customer note |
|
|
5e |
[getNote] |
The body information of the customer note |
|
|
6e |
[getAssignedToName] |
The first and last name of the user who is assigned to the customer note ticket |
|
|
7e |
[getTicketTypeName] |
The name for the ticket type if the customer note is a ticket |
|
|
8e |
[getCustomerLeadCompanyID] |
The partner company's SecurityTrax ID tied to the customer on the customer note |
|
|
9e |
[getTechScheduleAppointmentTypeName] |
The name of the appointment tied to the customer note's service type |
|
|
10e |
[getAdt_work_order_number] |
The ADT Work Order number that is associated with the customer note |
|
|
11e |
[getCustomerFlname] |
The customer note's customer's first and last name |
|
|
12e |
[getCustomerAccountNumber] |
The customer note's customer's account number |
|
|
13e |
[getCustomerAccountType] |
The customer note's customer's account type name |
|
|
14e |
[getTicketFollowUpDatetimeNotificationsFormat] |
The customer note's 'Follow Up Date' date and time |
|
|
15e |
[getCustomerID] |
The SecurityTrax ID of the customer tied to the customer note |
Customer At Risk Objects
'Customer At Risk Objects' reference Customers who haven't paid their monitoring bills.
Here is what was entered into the SecurityTrax Message Editor to create the sample above:
Dear %%[customer_at_risk][getCustomerFlname]%%,
We have yet to receive %%[customer_at_risk][getAmountOwedFormatted]%% for your security and home automation system.
Please remit payment as soon as possible to avoid distruptions in your service.
Sincerely,
Accounting Department
Triple A Security
Note the proper format when using Objects and Fields. Begin with two percentage symbols %% followed by the Object Type [customer_at_risk] followed by the desired Field [getUserFlname] in this case, then end with two more percentage symbols %%.
The table below contaings the Fields available for Customer At Risk Objects:
|
ITEM |
FIELD NAME |
DEFINITION |
SAMPLE (where applicable) |
|
1d |
[getCustomerFlname] |
The first and last name of the customer that is 'at risk' |
|
|
2d |
[getAmountOwedFormatted] |
The amount that the customer owes |
|
|
3d |
[getAmountCollectedFormatted] |
The amount collected from the customer |
|
|
4d |
[getAmountCreditedFormatted] |
The amount credited to the customer |
|
|
5d |
[getCustomerAtRiskReasonName] |
The description of the reason the customer is 'at risk' |
|
|
6d |
[getCustomerAtRiskResolutionName] |
The description of the resolution for the customer that is 'at risk' |
|
|
7d |
[getReasonCauseName] |
The description of the cause for the reason the customer is 'at risk' |
|
|
8d |
[getAssignedToUserFlname] |
The first and last name of the sales rep of the customer that is 'at risk' |
Warranties
The length of time your company will warranty a system for a customer.
REMINDER: All BOLD fields are required in order to save.
- Click on the Administration tab
- Click Warranties under Content Management
- Click Add Warranty located directly beneath the main tabs at the top
- Enter a Name
- Enter the number of Days
- Verify the Active checkbox is checked
- Click Save
- Repeat for each Warranty
Examples include 30, 60, or 9999 (Lifetime), but any length of time could be entered.
Titles
While not part of the Content Management section of the Administration tab, adding Titles is a straight forward process and only takes a few moments.
Titles are the various department names in your business and can be found under Organizational Structure under the Organization section.
REMINDER: All BOLD fields are required in order to save.
- Click on the Administration tab
- Click Organizational Structure under Organization
- Click Add User Title located directly beneath the main tabs at the top
- Enter a Name
- Enter a brief description
- Verify the Active checkbox is checked
- Click Save
- Repeat for each Title
Examples include CEO, COO, CFO, VP, etc. but any value could be entered.