5) Order Setup and Submission
Use the following steps to prepare your site to create orders. You must complete these steps in order to create an order.
1) Fill out the Customer Information
Personal Contact Information
ADT Pre-Check: You must run a Pre-Check (that does not return an error) prior to beginning the shelling process. The following information is required to shell or show up on the eContract:
- Email: Required
- Phone Number: Required
- Social Security #: The Last 4 digits of SSN or Birthday is required to run Credit Report
- Credit Score: Required
- Credit Tracking #: Required
NOTE: If the credit comes back without a score we will still provide the credit tracking number. This includes the following credit status’: Pending, Undecisioned, Declined.
Sale Information
- Proper MMR: Required
- Dealer #: Only required if submitting for sub-dealers, please ensure the correct dealer number is set on the Customer record.
Contract Term
- Activation Fee: will go on e-Contract
- Monitoring Plan: Must have the valid ADT Plan Selected
- Sold-By Field: must have a rep selected that has a Sales Rep Number within the Office Location assigned to the customer
To assign Sales Rep Numbers to Sales Reps, go to:
- Administration
- Users
- [Choose the User]
- Click on Representative Numbers button. Note that this button will only show up if the User is set up as a Sales Rep in SecurityTrax
- Assign them the appropriate Sales Rep Number
- Choose an Office Location
- Click Save
Installation and Equipment Information
- Abort Code: Required (Max. Character limit is 10)
- Services: Mark as appropriate for the account (Not Required for the API)
- Install Appointment: Not required to create but is required to submit the order.
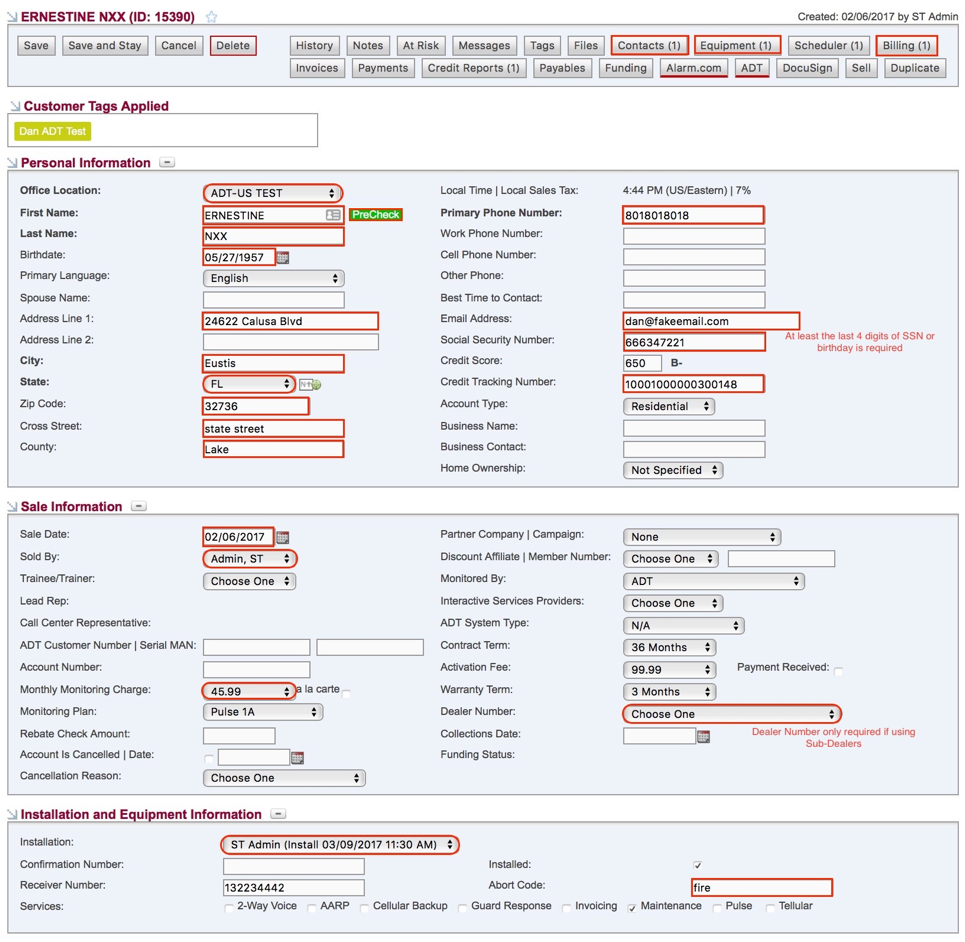
NOTE: ALL the fields with a red box around them are required to fill out or select to move forward.
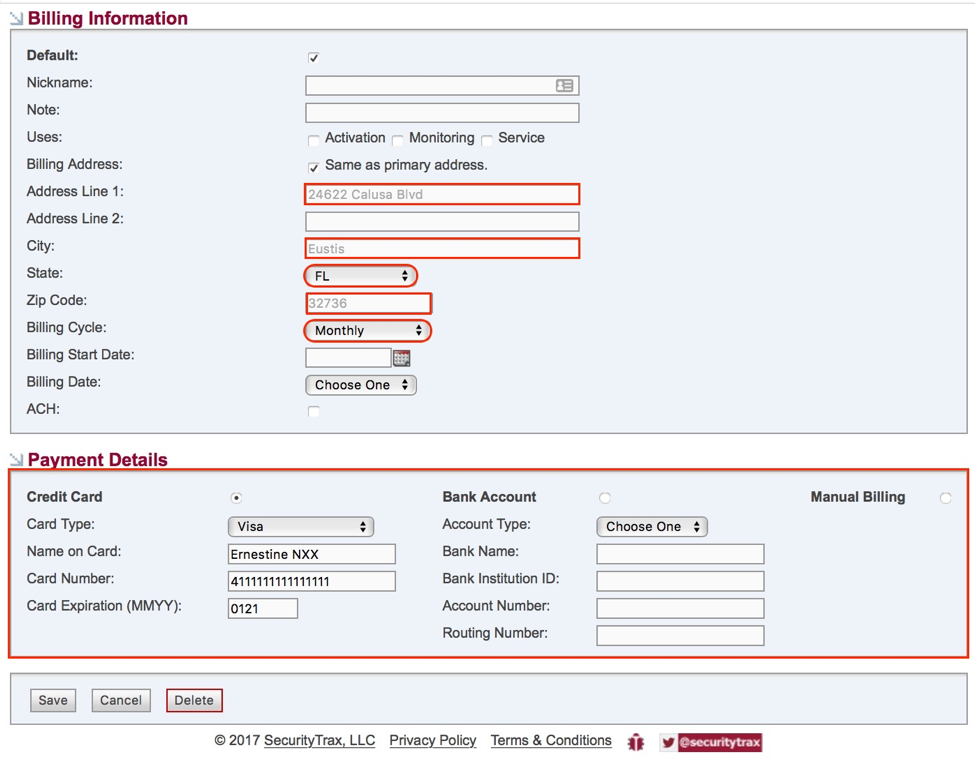
2) Default Billing Method
It's best practice to input a default billing method. If you need to change the default billing method you can do so at any time prior to “Confirming” the Order.
NOTE: WARNING!: ADT has requested that we do not prevent accounts from being submitted without a Billing Method; however, ADT will not fund an account where a Billing Method is not present.
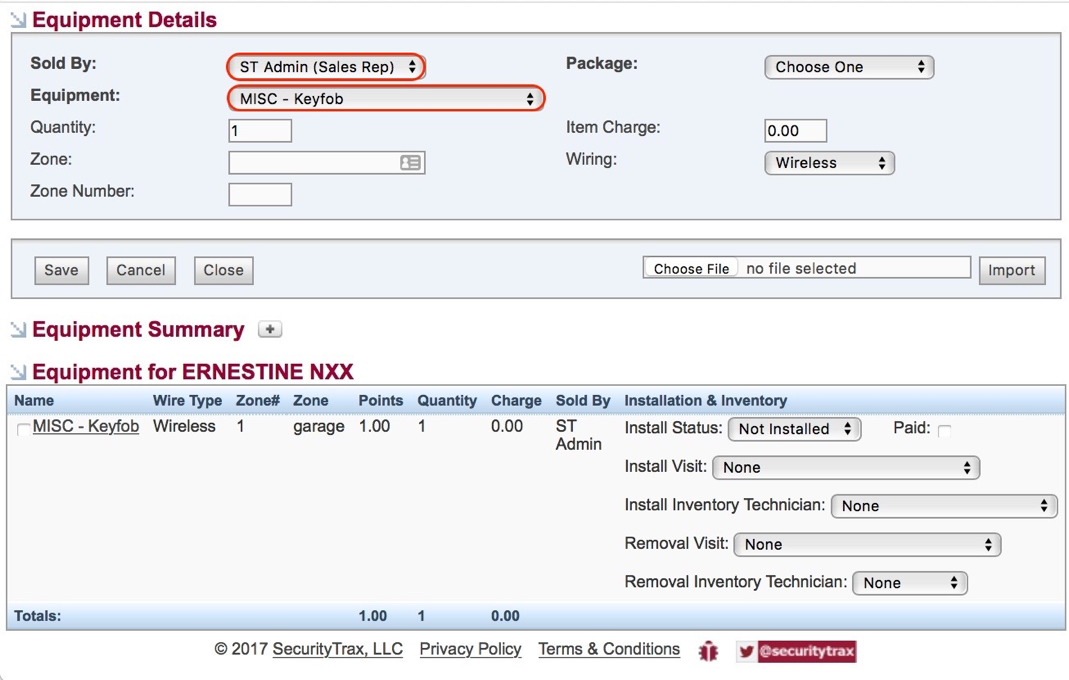
3) Equipment
Equipment can’t be left blank. You need to have at least one piece of equipment on the customer record for the Order to be validated. For your Account to be accepted by ADT make sure that the equipment on a customer includes the correct type of equipment for the monitoring plan/service package selected.
NOTE: Choosing “Existing” in the “Wiring” drop-down will cause the piece of equipment to show up on the eContract as “Preexisting”. This is used when there is already equipment in the home. You will want to make sure that is selected for any equipment that already exists in a customer’s home.
4) Emergency Contacts
Enhanced Verification: There must be at least one Emergency Contact that is marked “Enhanced Verification”. As part of the Dispatch procedure, ADT will call the premise/primary phone number. If no one answers, ADT will then call each Emergency Contact marked as “Enhanced Verification” before the Agency is called and authorities dispatched. If the Enhanced Verification contact knows the password he/she can stop the false alarm. If all primary/premise and Enhanced Verification contacts cannot confirm the verbal password, the authorities will be dispatched. There can be more than one ECV but ADT requires at least 1 (up to a max of 10).
Guard Response: If the customer is in a guard response area it is required to fill out the fee amount. ADT will no longer add this in for you. This is just like the legacy eContract process. During the shelling process, our integration will pull the Guard response from ADT and it will show on the Create/Update Order screen.
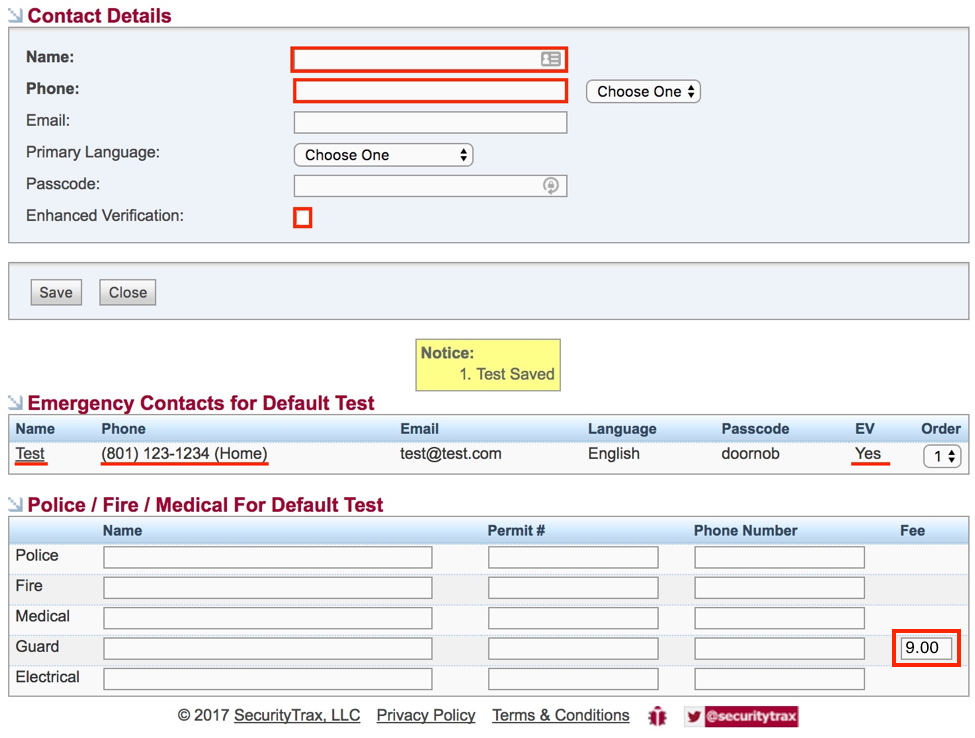
Be sure to click the ‘Guard Response’ box on the installation and equipment section of the customer screen.

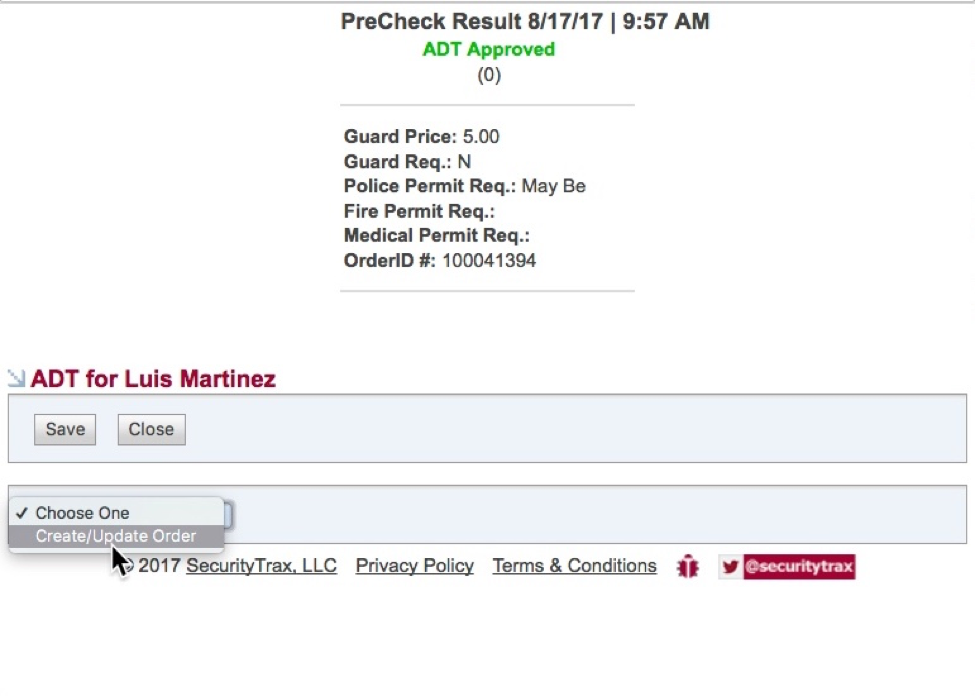
5) Create Order in ADT Integration Window
To begin the process of shelling an account through the ADT Integration click the ADT button on the Customer Screen. This button will not show up unless you have selected your ADT Monitoring Company option in the ‘Monitored By’ field.

Once you’ve clicked on the ADT Integration Button a new window will pop up. If a Pre-Check hasn’t run it will present a warning that it is not complete. Complete the Pre-Check by clicking the Pre-check button on the Customer Screen.
NOTE: The Integration window does not save your drop-down selections if you close the window creating the order. If you need to make a change to the customer in SecurityTrax, you may do so, but ensure that you keep the Integration window open and then right-click and select “Reload Page” on the Integration Window. This will preserve any selections or data you have entered previously in the ADT integration window. If you close the window to fix something, it will clear out your selections.
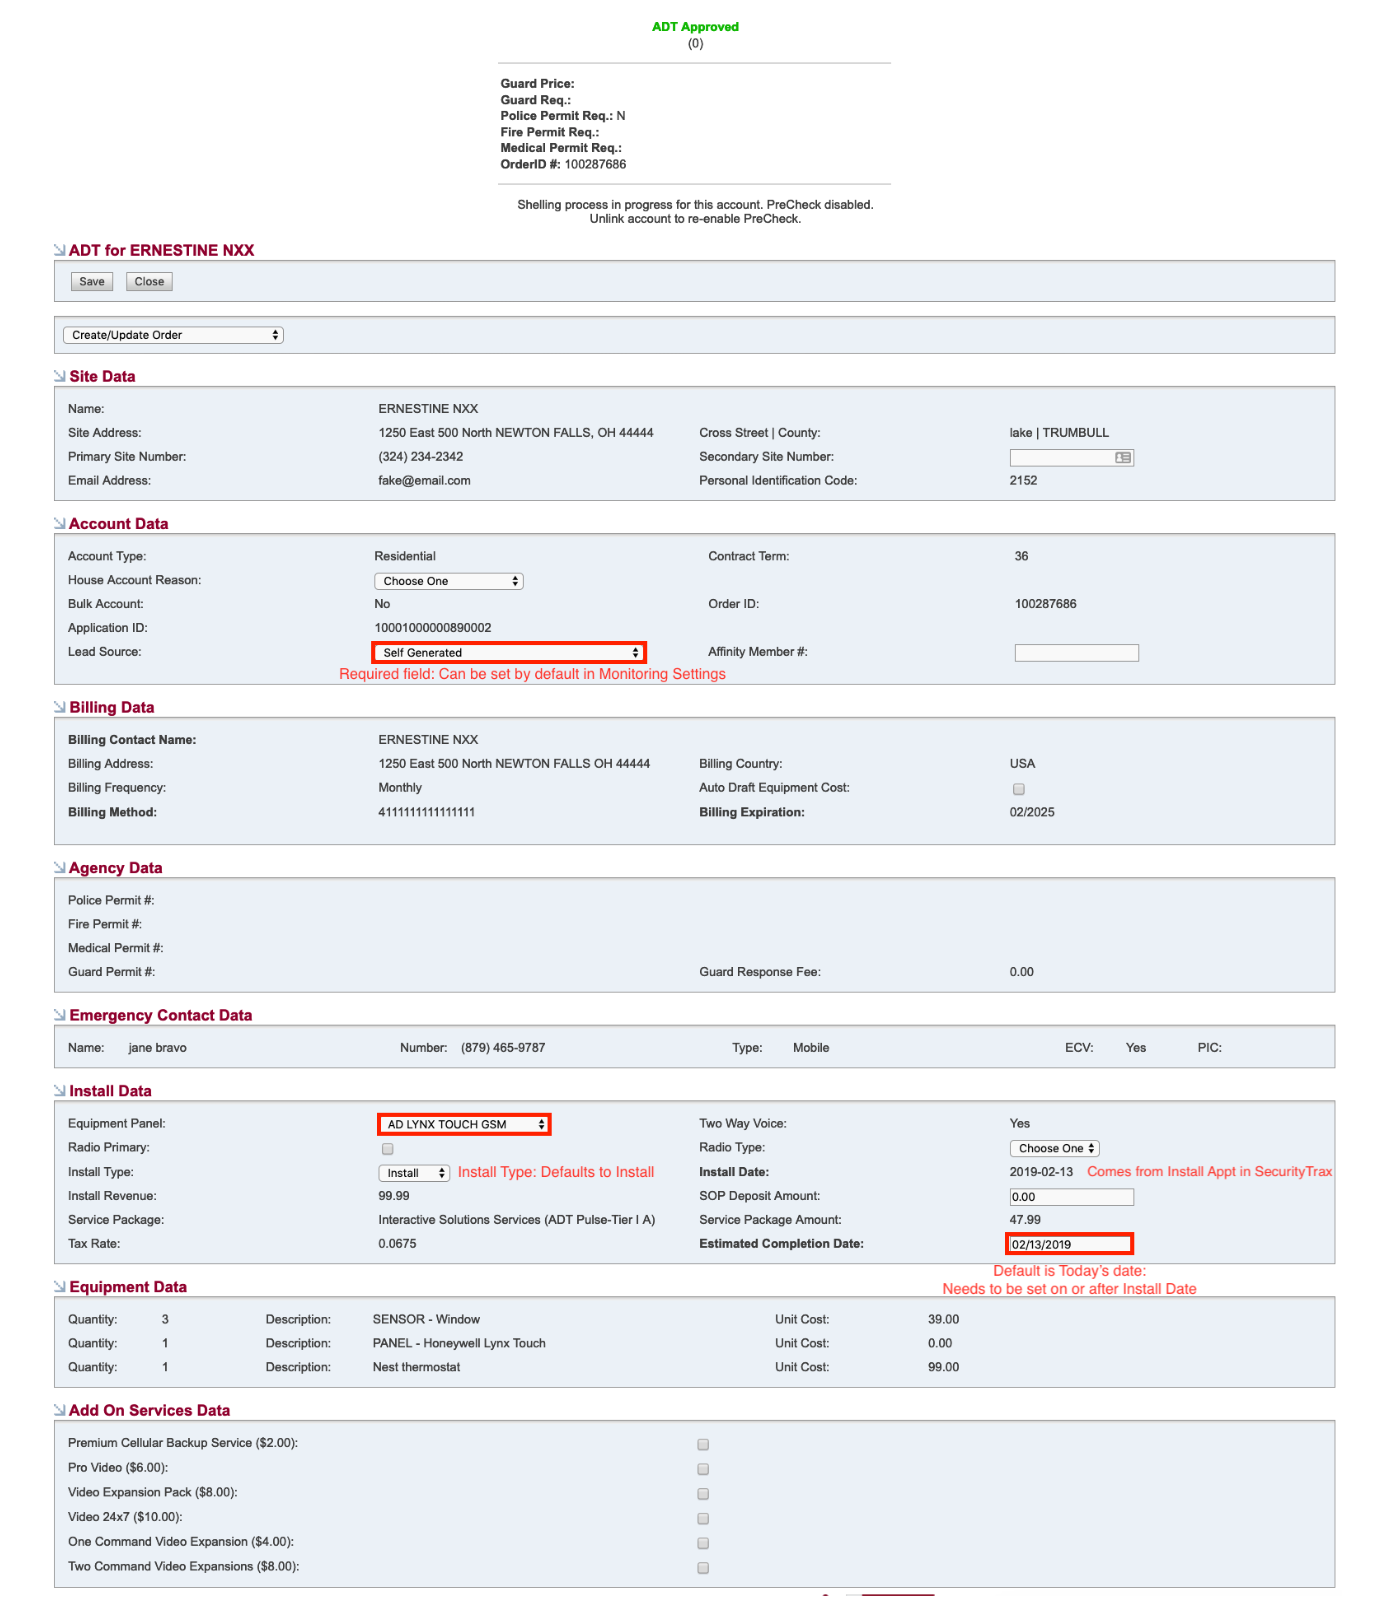
Installation Date and Estimated Completion Date fields will be auto-generated from SecurityTrax if you have not scheduled an Installation Appointment. Please ensure that you schedule an Installation Appointment in SecurityTrax prior to Confirming the order, or ADT may reject your account.
Make sure to properly select any additional Add On Services before submitting.
6) E-Contracts
You cannot create an eContract if there are any Holds on the account. These Holds will show up on the “Order Status” page of the ADT Integration window under the “Holds (Active)” section of the screen. Once you resolve a Hold, the Hold will move from the “Holds (Active)” section to the “Holds (Resolved)” section.
There are no limits on the number of contracts that you create on a customer.
If you get a pre-check error that says "Nape 9" that means that it’s matched against an order that is already existing.
NOTE: When doing delivery by email, the 'Sign Here' link will still show up as if you could do the embedded signing, however, if you click on it, it will just give you an error.
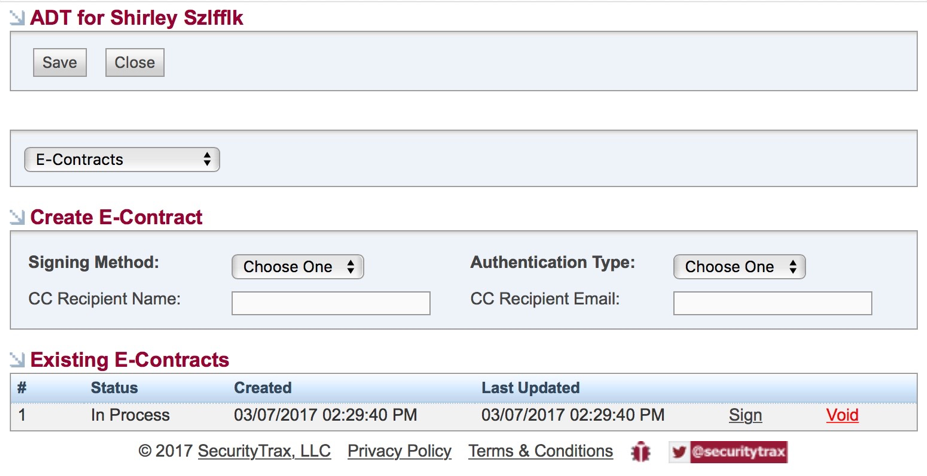
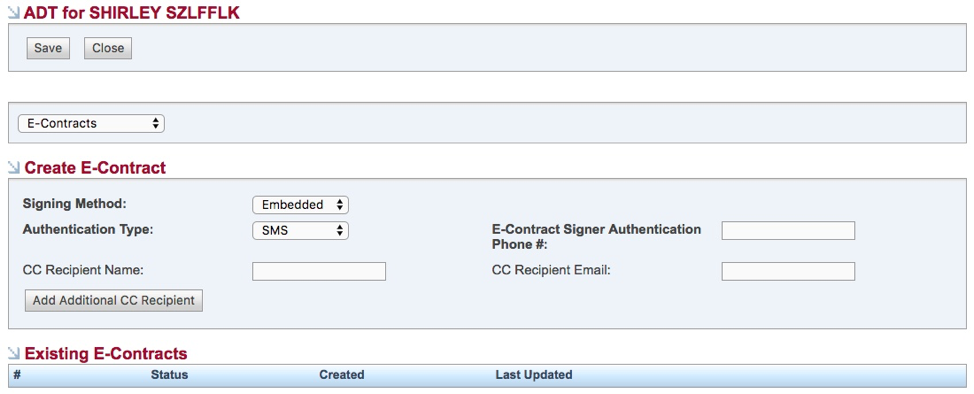
There are two ways to deliver the econtract to your customer for signing. It can be emailed or embedded.
The eContract screen is dynamic, meaning that if you select ‘Email’ or ‘Embedded’ it will display different information.
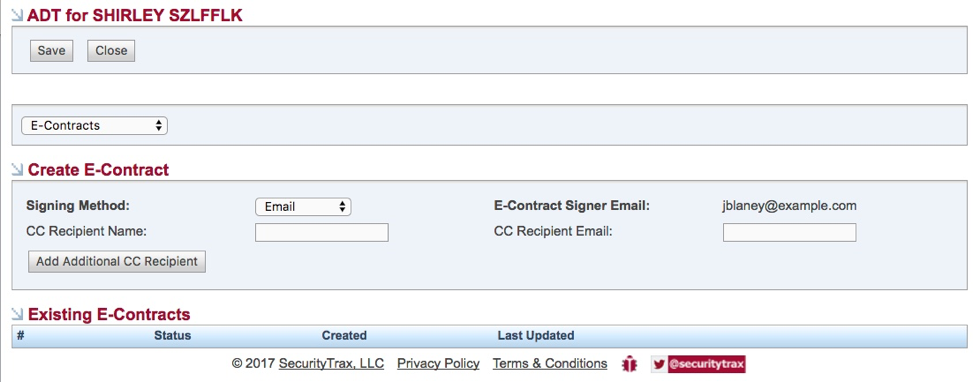
In both options, you can send a carbon-copy of the finished contract to anyone you or the customer would like. You do this by filling out “CC Recipient Name” and “CC Recipient Email” fields. You may add as many as you like.
If sending the contract by email, simply select “email” as the signing method. Double check your signer email and click save. This will deliver a link for access to sign the contract.
Embedded allows the signing process to happen on the device you are using. A ‘Sign Here’ link will appear to start the signing process.
Before a customer can access the contract through the ‘sign here’ link they will need to input an authorization code. This is received through either text message (SMS) or by a recorded phone message. Enter the desired authentication type and the customer’s phone number. Click save and the “Sign Here” link will appear. Hand your device to the customer to click and begin the signing process.
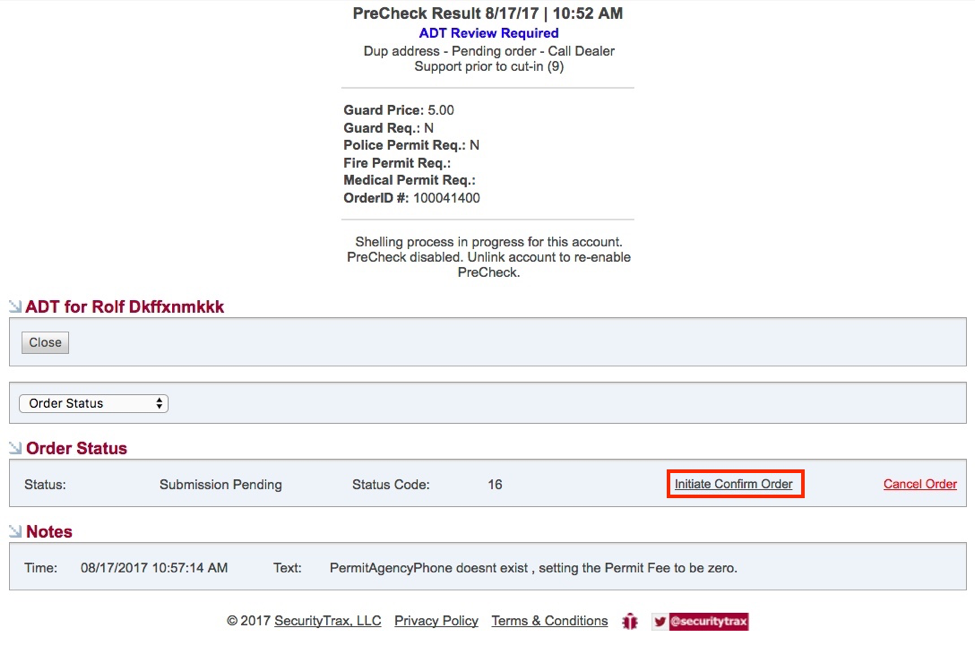
7) Confirm Order/Submission
Once the Order is created and the E-Contract is complete, you must select 'Order Status' from the drop-down menu on the ADT Integration window and then click on ‘Initiate Confirm Order' to submit the account to ADT.
After clicking to confirm the order you will see the Status change to “Submission in Progress” which will remain until ADT reports back to SecurityTrax the results of the submission. After which the Status will read either “Submitted” or “Submission Failed”. You may need to refresh the page to see the status update from “Submission in Progress” to “Submitted”.
NOTE: To cancel and/or update an order after it has been submitted you must call Dealer Support. ONCE AN ACCOUNT HAS BEEN SUBMITTED YOU CANNOT CANCEL/UPDATE IT THROUGH THE INTEGRATION.
8) Verify ADT Serial MAN and Account Number
During the "Initiate Confirm Order" step, the Account Number and Serial MAN (and Receiver Number, when applicable) will auto-populate in the Account Number, Serial MAN and Receiver Number fields in SecurityTrax. This happens once Order Status is “Submitted”.
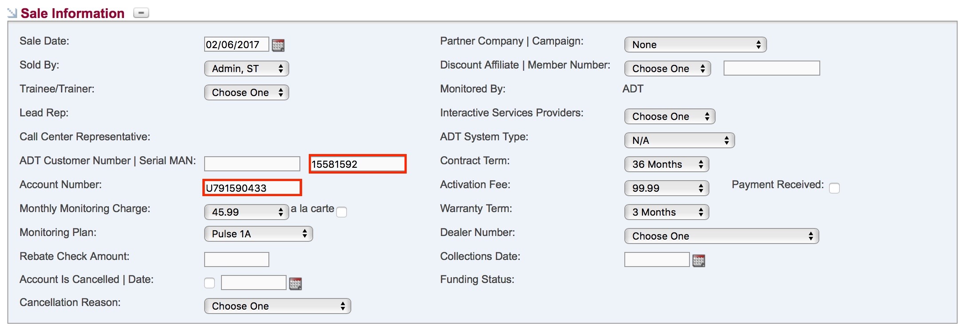
Congratulations, your account is now fully shelled and submitted to ADT!