Standard Create: 3-Step Workflow
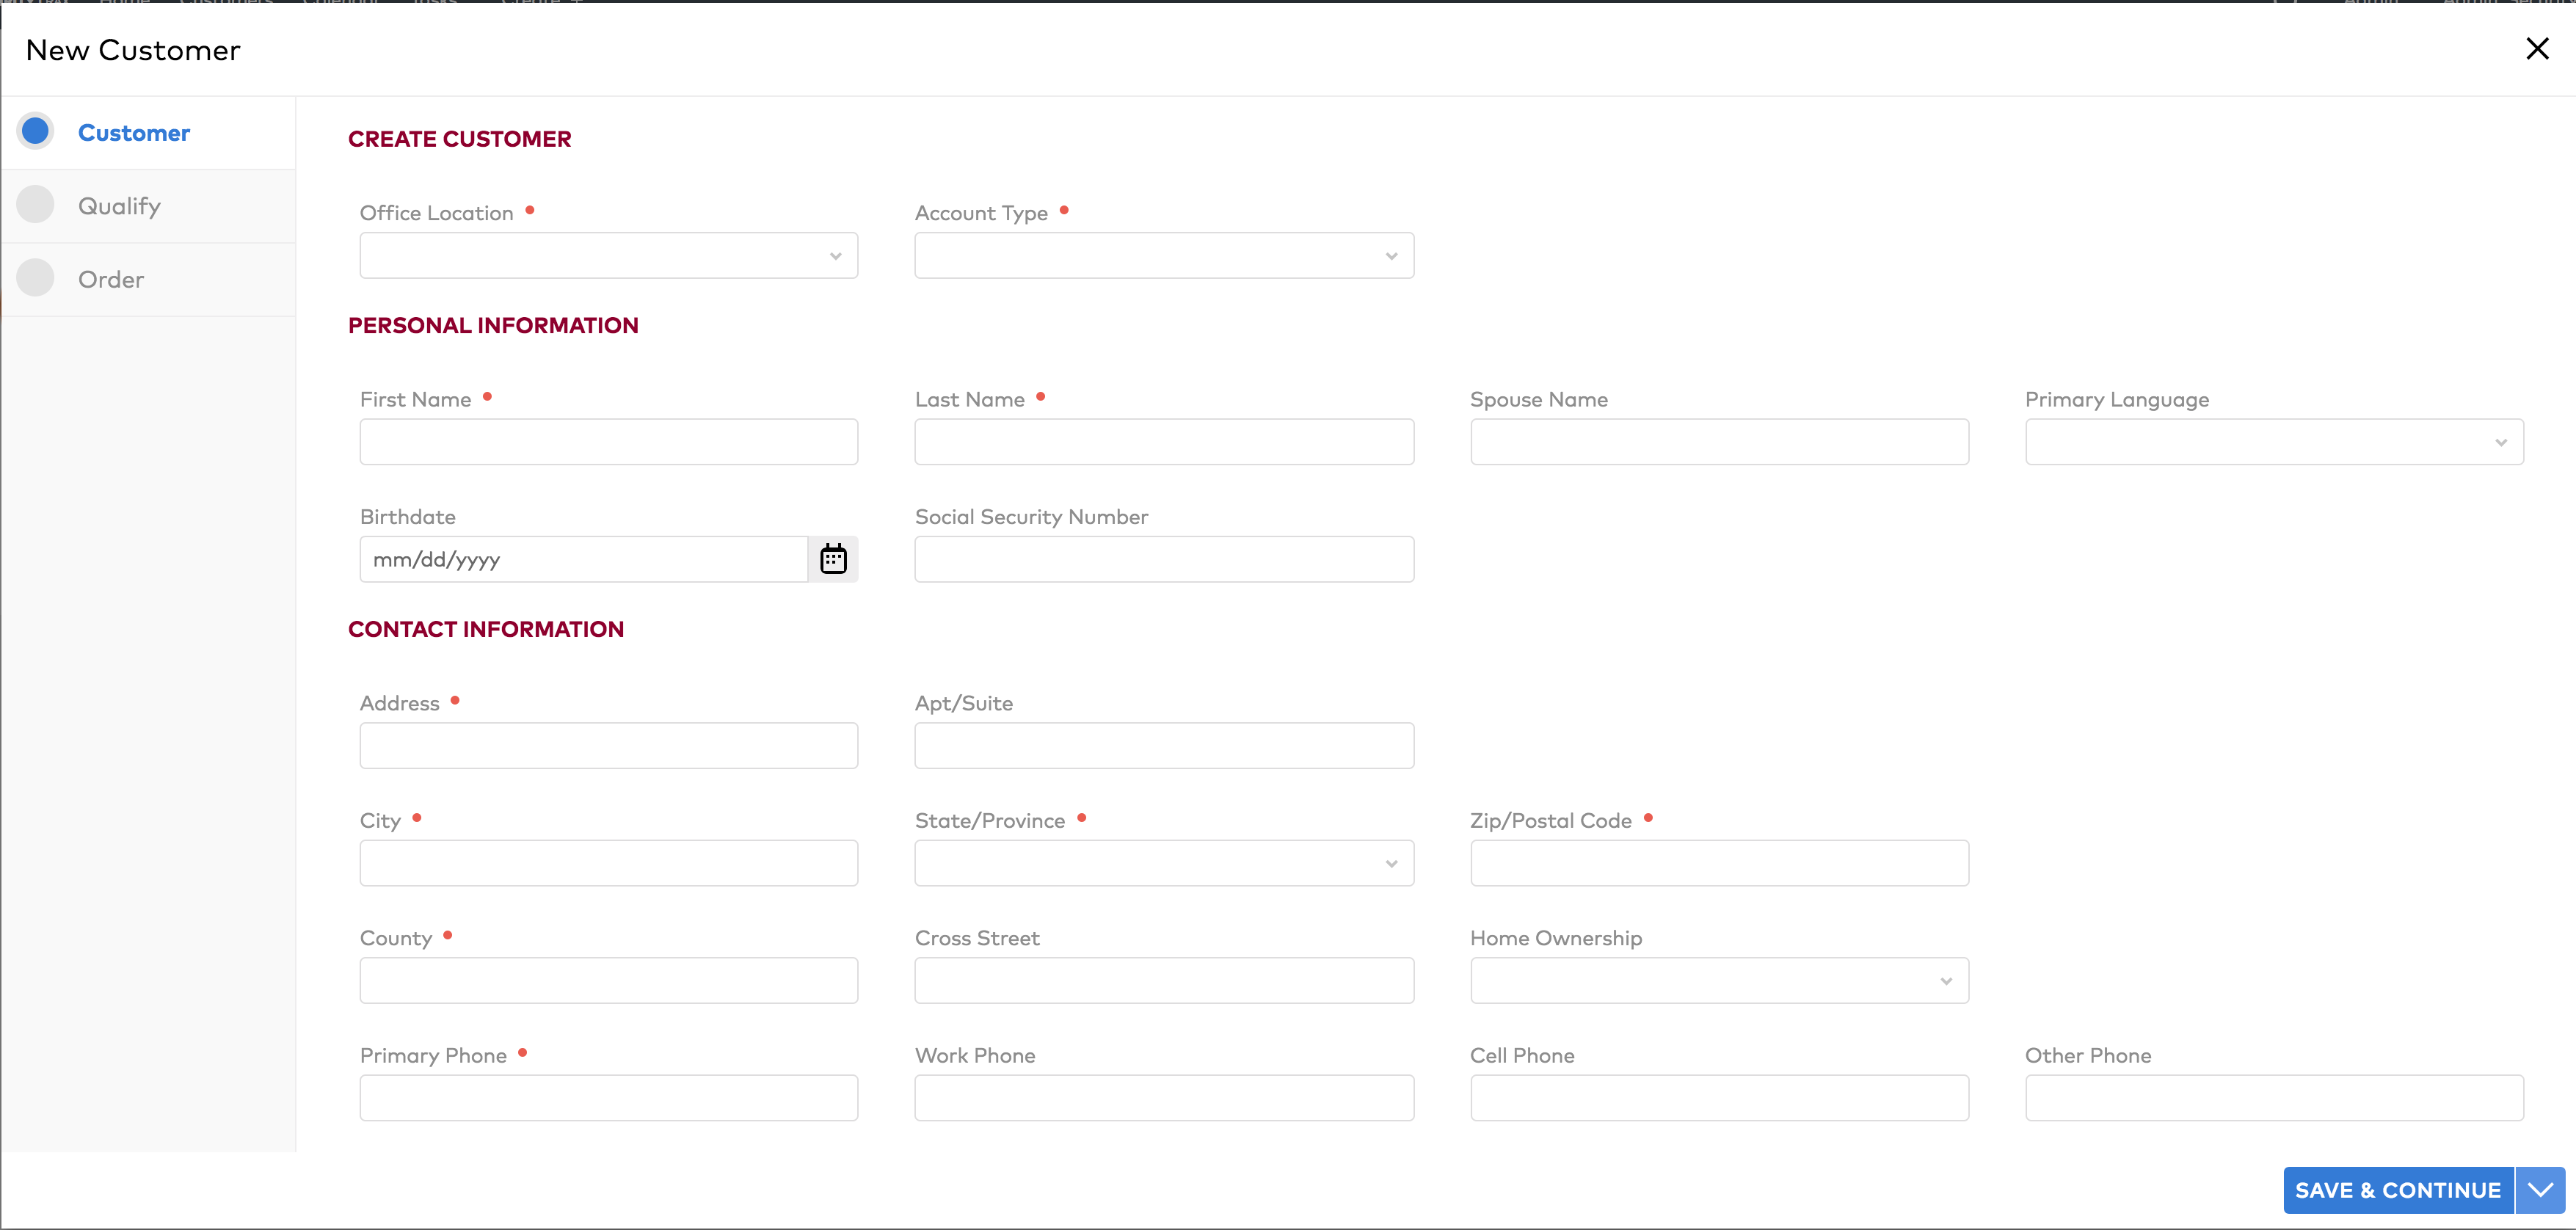
To create a new customer
- Fill out all required fields and any other information.
- Click Save & Continue to continue with the wizard.
Note: After filling in the zip code, the State, City, and County will auto-fill. You can also select Save & Close on the Save & Continue dropdown to exit the wizard, or delete the customer by selecting Delete Customer on the Save & Continue dropdown. If the address is not associated with a valid geocode, a warning message will appear on all customer pages.
To qualify a customer
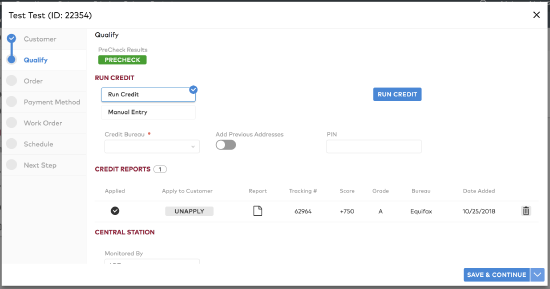
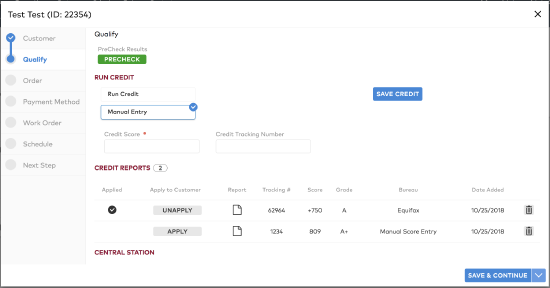
The next step of the wizard allows you to qualify a customer. Select Run Credit or Manual Entry.
- Run Credit
- Click Unapply to unapply a credit report to the account.
- Click Apply to apply a credit report to the account.
- Select a Credit Bureau from the dropdown and click Run Credit.
- Manual Entry
- Enter a Credit Score and Tracking Number then click Save Credit (this will appear on the list of Credit Reports without a Bureau listed).
- Click Apply to apply a credit report to the account.
- Click Unapply to unapply a credit report to the account.
- Click Save & Continue to continue with the wizard.
Note: You can select Save & Close on the Save & Continue dropdown to exit the wizard. You can also delete the customer by selecting Delete Customer on the Save & Continue dropdown.
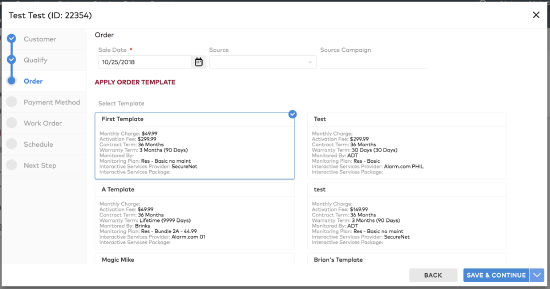
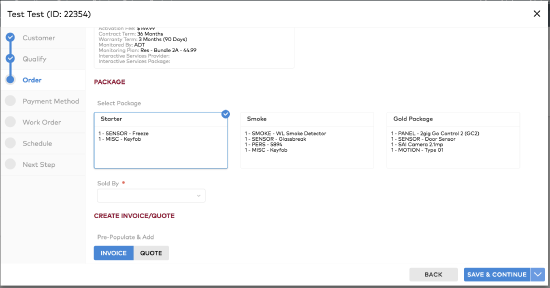
To create an order
The next step of the wizard allows you to create an order. Follow these steps:
- Fill out the required fields and any other desired information.
- Select a Template and Package, if applicable.
- Click Save & Continue.
Note: At this point you can click Back to go back and edit any previously entered information. You can select Save & Close on the Save & Continue dropdown to exit the wizard. You can also delete the customer by selecting Delete Customer on the Save & Continue dropdown.
